Thriivan's Walkthroughs
Shin Megami Tensei: Persona 2: Innocent Sin
My personal walkthrough of Persona 2: Innocent Sin, this is specifically for the PSP remake. I hope you enjoy!Please note that both Persona 2 games were released on PS1 with remakes on PSP in Japan; but due to a very weird turn of events, only the PSP version of Innocent Sin and the PS1 version of Eternal Punishment were released in America. So, if you play them both, you will be sort of going backwards in quality when you play the sequel. There is a fan translation of the PSP version of Eternal Punishment, and I have used that version for my Eternal Punishment walkthrough, for it is a big quality upgrade.
Thriivan's Walkthroughs
Contents
Thriivan's Walkthroughs
Beginning the Game
Choose your difficulty of course. Just like last time, I went with easy mode because I just want to see the story.This game really jumps straight into things, not wasting any time with the "I am thou..." bit. His default name is Tatsuya Suou, but you can name him whatever you like. I would recommend at least keeping it as a Japanese name though, just for consistency, otherwise it stands out too much in my opinion.Just FYI, in this walkthrough I will tell you to talk to certain people and go certain places, but I want you to take your time and do as many other things, and talk to as many other NPCs as possible. Don't feel rushed by my instructions.Once you're in control, there are a few conversations we need to have, and items to grab before we go and see Ms. Saeko (from Persona 1).Talk to the kids out here if you want, but when you're ready, go ahead and head inside. Head up the hallway and talk to the kid by the shoe racks, and he will mention the Joker Game. Next, head outside from here, to the courtyard and speak to Ms. Ideal and Principal Hanya. Now, head back inside, find the stairs and head up to 2F. There is a female student up here, talk to her. There is also a box at the northeast end of the hallway that contains Antidote x2. Next, head up to 3F and speak to the male student here. There is a box on the same spot as the last floor, this one containing 1,000 yen.Once you're ready, return to the bike racks where you first started the game to commence a scene with Ms. Saeko. Pick whatever dialogue options you like. It only changes minor details later, nothing important. After this scene is over you'll see a scene elsewhere and get introduced to new characters. Then, a long series of cutscenes.When you're finally in control, talk to people if you like, but otherwise, exit the prison via the staircase. They'll stop you and you'll have a quick conversation about where to go. Now you can actually leave. Next stop, Shiraishi Ramen.
Thriivan's Walkthroughs
Shiraishi Ramen Part I
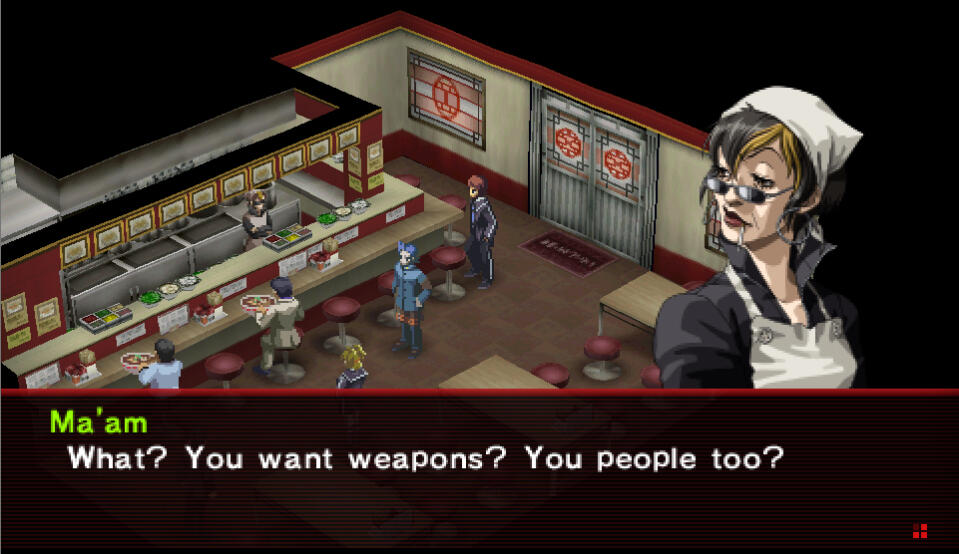
Now that you're on the Hirasaka map, if you hold ▢ down, it will show you every visitable location. You'll see Kameya Alley in the northwest corner. Go ahead and go there. You'll now see 6 options of where specifically to go. Our goal here is Shiraishi Ramen, but feel free to check out the other locations if you'd like.When you enter the ramen shop you'll see a scene with Tadashi from Persona 1 and the store owner. When you're in control, speak with Tadashi to learn about the Kuzunoha Detective Agency. Feel free to speak to anyone else, of course. However, the owner of the shop, Ma'am, will deny any claims of selling weapons.Next stop, Kuzunoha Detective Agency.
Thriivan's Walkthroughs
Kuzunoha Detective Agency
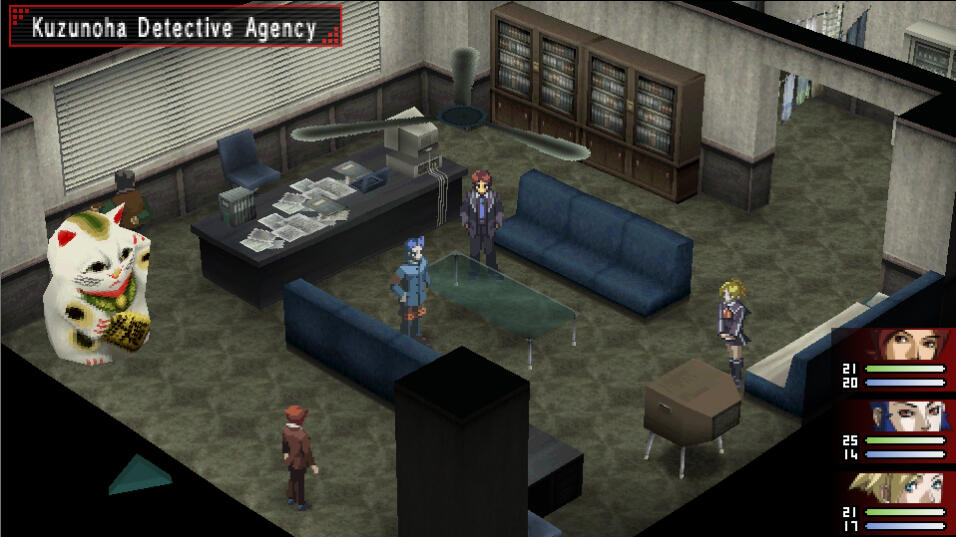
When you leave Shiraishi Ramen, you'll notice that Kameya Alley now has a 7th destination available, the agency. Go ahead and head straight there.As you enter, you'll see a cutscene that explains how rumors work in this game. This is a big mechanic of the game and you'll be coming here frequently to purposely spread rumors.Note: The lucky cat here will give you some items that increase your stats if you give it 10,000 yen, and there are a few more you can find in the game. So whenever you feel like you can drop that much money go ahead and head back to the cat.After you spread the rumor about Ma'am, go ahead and head back to Shiraishi Ramen.
Thriivan's Walkthroughs
Shiraishi Ramen Part II
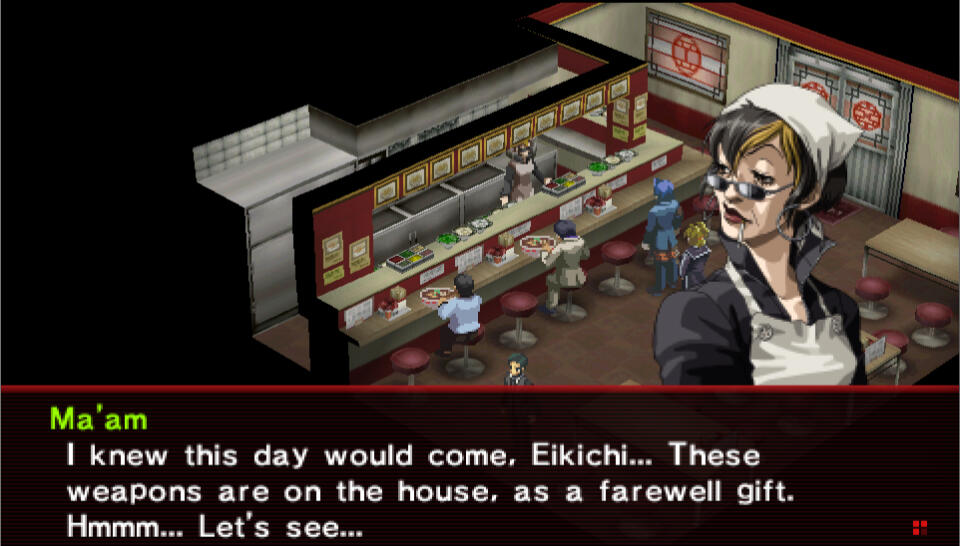
When you arrive, you'll see a cutscene. You'll get your starting weapons and it will automatically send you back outside, as Tadashi seems to order himself a weapon. Your new weapons will be automatically equipped, so go ahead and head to Toua Defense which is also found in Kameya Alley. Buy whatever you like, and when you leave you can go into your equipment and hit the optimal button instead of having to individually equip everything. You don't have any tarot cards yet, but go ahead and make a stop at the Velvet Room just to get acquainted with Igor. He is a recurring character in the Persona games who resides in the Velvet Room and he is your go-to man for all things related to your personas. When you're ready, we're heading to our first dungeon. Seven Sisters High.
Thriivan's Walkthroughs
Seven Sisters High
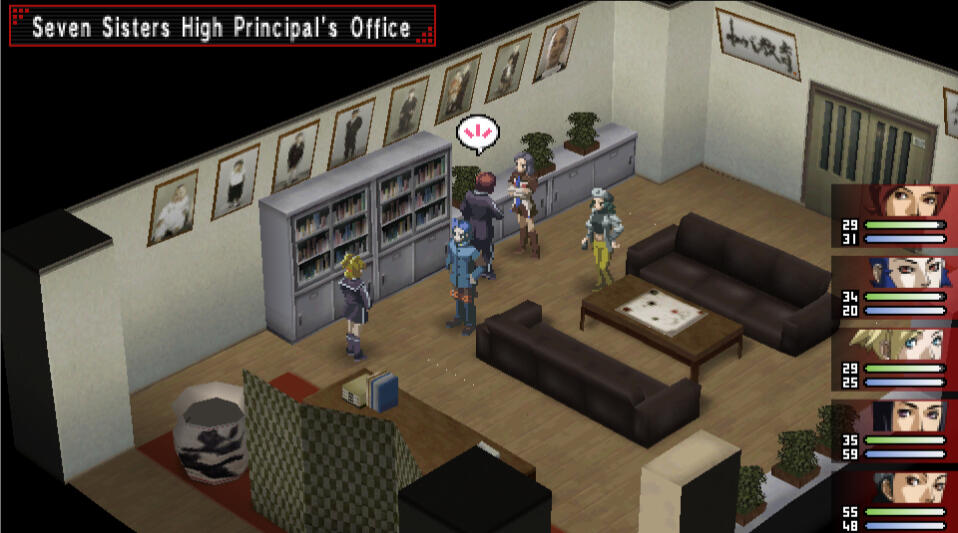
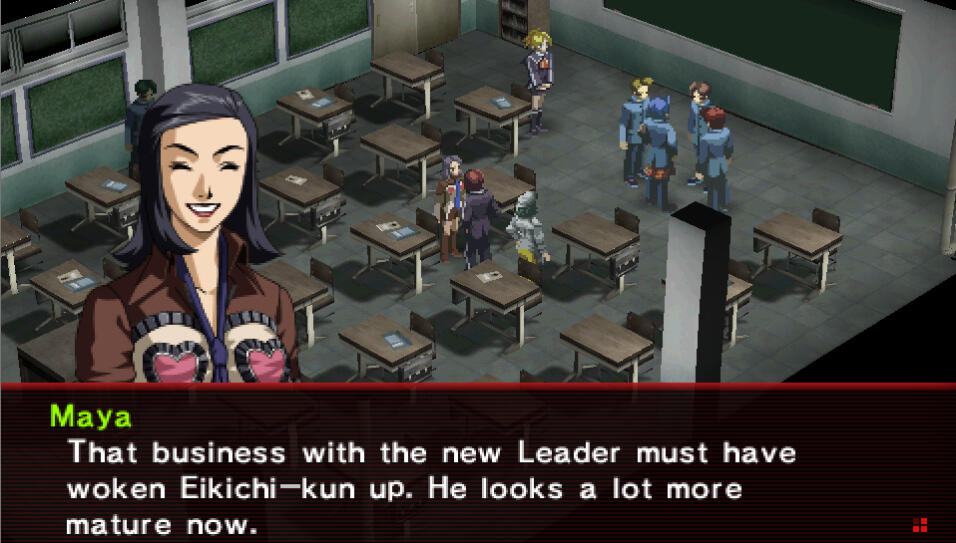
So, first thing you have to do to reach Seven Sisters High again is leave Hirasaka by taking any of the roads to the edge of the screen. You'll be taken to the Sumaru City map. Enter Rengedai. Feel free to explore the other locations here and speak to the green NPC markers, but you probably don't have any spending money right now. Head to Seven Sisters High when you're ready.Upon entering, you'll see a bit of a freaky cutscene. You're now inside the school, as your first dungeon. You should probably know a little bit about the mechanics of battle though. So, this game has something called Fusion Spells. You have to use spells in a specific order to activate them. This includes changing the turn order of your party just to do it in the right order. You start with Hydro Boost which is Fire, Earth, then Water.You should also know about the Contact mechanic. This is basically negotiating with demons. If you played Persona 1 or 5, you know about this concept already, but I added a contact guide here to help out.Moving on, the first thing you should do in this dungeon is head to Class 2-B. Once there, speak with the students there to learn about the Hanako Rumor. Now this is going to sound strange, but exit the dungeon, head back to Kuzunoha Detective Agency and spread the rumor about Hanako. You may need to grind a bit to get the 3,000 yen to do so first if you spent all your money on equipment (so did I, it's okay).When you return to the school, Hanako will be a random encounter (a toilet with a little girl in it), so after you find and kill her, make sure to turn in Hanako's Nametag that you get from the battle to the student in Class 2-B for your reward. Once you finish this dungeon you lose your chance.Head up to 3F and to the north end of the hallway to find Principal Hanya's Office. You'll watch some cutscenes and afterword you'll have recruited Maya and Yukino (from Persona 1).After you recruit them, you need to destroy all 10 clocks in the school.The clocks are above the blackboards at the front of the classrooms. Work your way around the school and find them. This will help:1F: 3 Clocks
2F: 2 Clocks
3F: 2 ClocksAfter you destroy these 7 clocks, you'll be notified that there are more in the Teacher's Lounge.
Teacher's Lounge(2F): 3 ClocksAfter you destroy all 10 clocks, you'll realize you have a bit more to do. You need a key to reach the big clock on the clocktower and destroy it. Before you leave the Teacher's Lounge, speak with the teacher in the brown suit.The Janitor's Room is on 1F, at the end of the hall just like the Teacher's Lounge was. Go ahead and head down there.After entering, you'll see some brief dialogue. Talk to everyone at least once to move on to a second scene, where you will obtain the Clocktower Key.While you're on 1F, and you could have done this a while ago, you can go out to the courtyard for a little scene and you can talk to Ms. Ideal a little. It's not necessary at all though, but you can if you want to.Go ahead and make your way up to 4F. The stairs to 4F are in the center of the hallway on 3F.You're about to have your first boss fight so make sure you're prepared before you enter the door at the other end of the hall on 4F.When you enter, a cutscene will begin, and soon after, so will the first boss.Boss: Principal Hanya: So he's a pretty easy boss, just keep in mind that he is weak to fire and blocks ice and water and you'll make it through the fight pretty quickly. The persona skills will do better than your regular weapons. Just keep healed up and you're good to go.After the fight, you'll see some more cutscenes. You will be approached by a student who will ask you if Hanya died or not. If you say, No, he made it. it will be easier to obtain the ultimate weapon of a future party member later on. But this is only a minor choice that doesn't affect the overall plot, so feel free to answer as you wish.At this point you can go ahead and leave Seven Sisters High, but just keep in mind that you must turn in Hanako's Nametag before you leave or you will never be able to finish the quest. Before we move on with the main story, we need to begin Spreading Rumors.
Thriivan's Walkthroughs
Spreading Rumors Part I
We need to talk to every Rumormonger that we have access to, and spread those rumors. Keep in mind these Rumormongers are super important to the story and we'll have to interact with them regularly. I have made a guide for them here so you can always find them.
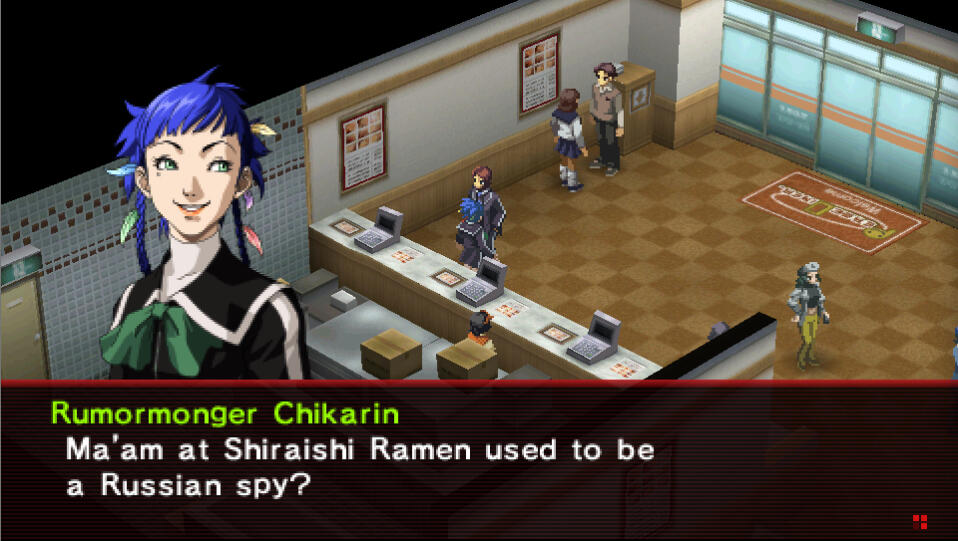
First stop, Honmaru Park just to the west of Seven Sisters High. You'll be wanting to speak to Toku. Ask him everything you can until you have exhausted all of your options.Next stop, head to Hirasaka and go to Kameya Alley again, and enter Gatten Sushi. Upon entering, you'll see a brief cutscene with Michel's terrible dad. You're looking for a man named Toro. He's a super forgettable character from Persona 1 actually. But anyway, repeat the process that you did with Toku.Last stop, head to Yumezaki, a new location you now have access to. Go to Yumezaki Center and enter Peace Diner. You'll automatically enter a cutscene where you meet Chikarin, the girl you're here to speak to. After the cutscene, talk to her and repeat the same process yet again.Now, I'm sure you've noticed that they all basically gave you the same rumors with slight differences, like the prices and quality of items. This is so you have options when you go to spread the rumors around. I highly recommend going with the Quality is good, but it's expensive options when spreading these rumors. It is up to you though, of course. Just keep in mind that once a rumor is spread, there is no going back.Head back to Hirasaka > Kameya Alley > Kuzunoha Detective Agency and spread those rumors. Keep in mind that these are specifically for shops in Rengedai so that means the shops at Lotus. For the Magazine Sweepstakes rumor, I would recommend Very hard to win, but prizes are great. because the items are useful for the entire game, while the other two options give you items that are only useful for the first half of the game. As for the Mu Casino rumor, this is all about what YOU prefer. Basically, if you want to rely on chance alone, choose the slots, but if you want to play poker or blackjack, pick one of those.Now that you spread these rumors you should be good to go. The sweepstakes are run for you by Tamaki, so just buy the magazines from item shops and turn them into her and she handles it for you. The more you buy, the better.At this point, you can explore the city as much as you like. Summon Personas at the Velvet Room, go gambling at Mu, buy the sweepstakes magazines at item shops, etc. When you're ready to move on, we're headed to Zodiac in Yumezaki.
Thriivan's Walkthroughs
Zodiac
Once you enter, you'll be in a circular hallway, just head to the red door to the north to watch a cutscene. After the cutscene, Michel leaves the party. He will not be returning until after you defeat the boss of Zodiac. Once in control, talk to the employee behind the counter on the left.If you have 3,000 yen at the moment, you can go spread this rumor and it'll make the 2nd floor more difficult to navigate but will give you better loot. This is the only opportunity to use this rumor, so you can do it if you like.When you're ready to begin the dungeon, go ahead and enter the door Michel ran into.In general, for all dungeons, just fill out the map for each floor to make sure you don't miss anything, then head up the stairs last. treasures will appear as a little sparkle symbol. Make sure to watch out for the....piss? vomit? whatever fluid is on the ground, it hurts you.Okay, so on 1F, the stairs are found in the northwest. That's about it.On 2F, there is Medicine x3 in the northeast, Free Card x1 in the west, a Staff Room in the southeast, and Trish's Spring (where you can pay to heal up) in the southwest right by the stairs leading to 3F.On 3F, The Staff Room can be found in the northeast, and then a bit south from that corner. In here, you'll want to do two things: get a spare Mysterious Mask from the open box on the left by Ginko and talk to Yukino and say Yeah. This will unlock a special Group Contact with her.When you enter the room with Michel in it, you'll enter some cutscenes. Select Wait and see what happens in order for him to get his Prime Persona later on in the game.Note: This game has a moment like this for various people where they must handle something on their own, for what truly defines them. This was Michel's moment, which is why it was necessary for him to unlock his Prime Persona.After the cutscenes, you'll have Michel back and you'll automatically be transported back out to the city map.Next stop, Kasugayama High.
Thriivan's Walkthroughs
Kasugayama High Part I
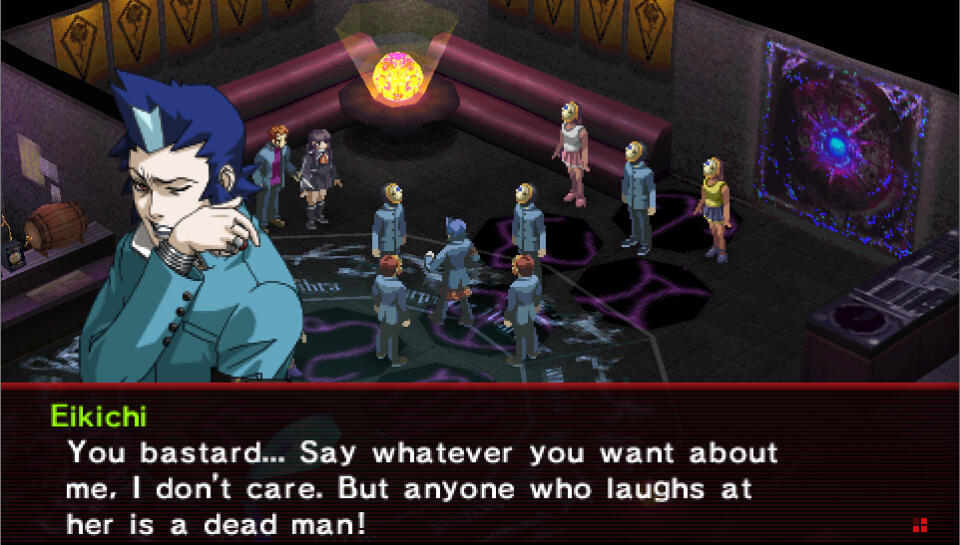
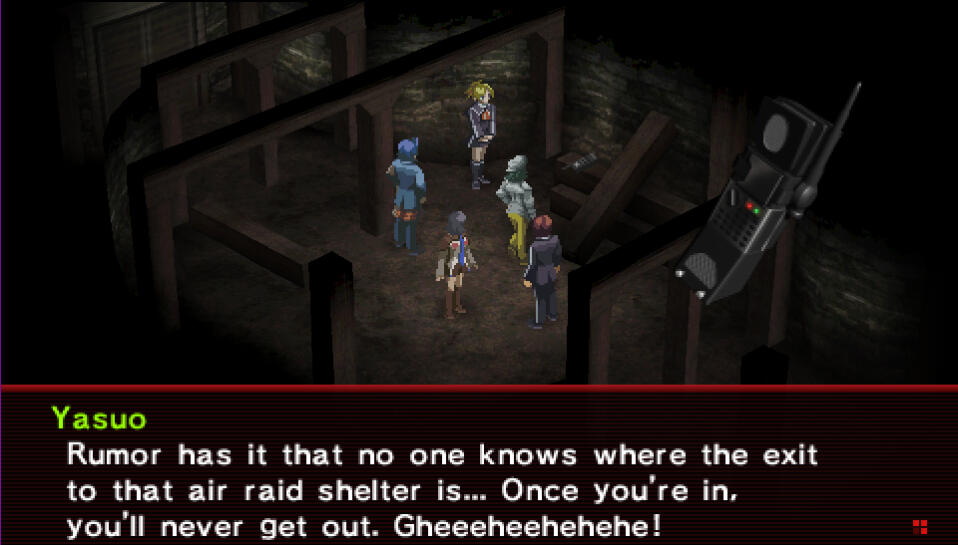
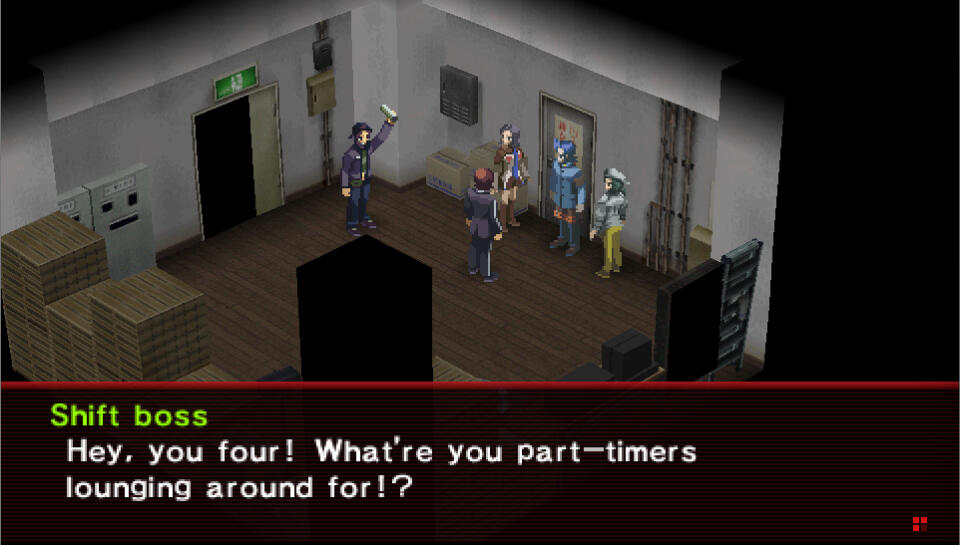
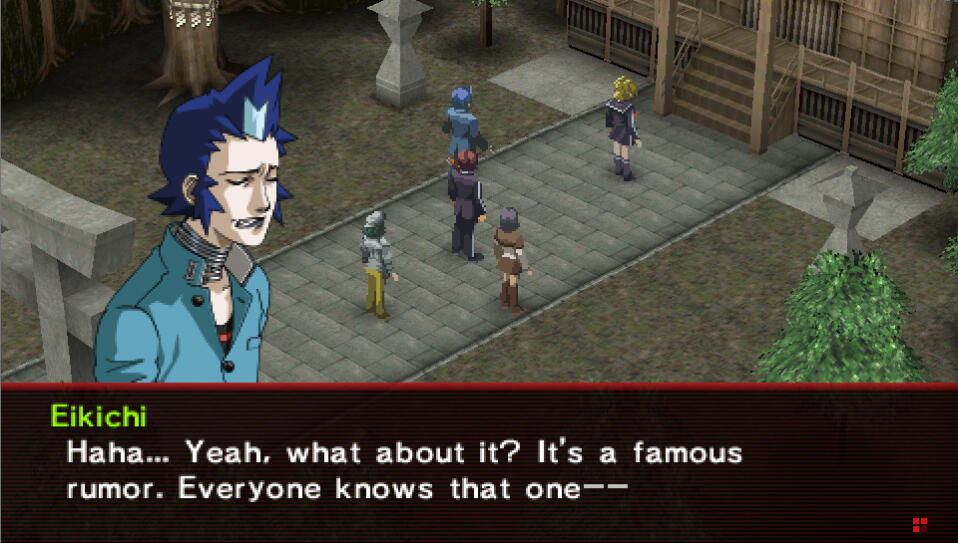
Before you venture off to Kasugayama High, I highly recommend visiting a Velvet Room and making yourself some personas, if you haven't already. There's one in every shopping area. Basically, it costs a certain amount of tarot cards of a certain arcana to summon a new persona. Then some of them have a better affinity toward certain characters than others. For example, if you make a Pixie, then you should give that to Ginko for the best results. and that's just about it. The personas rank up the more you use their abilities.Upgrade your equipment if you need to, then go ahead and head to Hirasaka > Kasugayama High.Upon entering, you'll see a cutscene. Once you have control, it's dungeon time. I highly recommend grinding for levels and tarot cards as much as possible in this dungeon so you can survive the following dungeon after this.First thing you should do if sin Class 1-2 on 1F and speak with Eikichi while you're in there. Tell him I'm stronger for a new Group Contact with him.Second, head to 2F > Student Council Room and speak to Eikichi and Earnest Student inside.Third, head up to 3F > Class 3-1, and speak to Eikichi or Maya for a scene.Fourth, head down to 2F > Class 2-4 and speak to the student to Eikichi's right. He tells you about the president's whereabouts.Once you have done this, you are ready to enter the next dungeon. When you enter you are going to be stuck there until you finish it, so at this point just make sure you grind as much as you need to to ensure you're ready to begin.When you think you're ready, go ahead and head down to B1F of Kasugayama High. Head past the desks and enter the next door. After you enter there will be a scene and you'll find yourself in the Air Raid Shelter.
Thriivan's Walkthroughs
Air Raid Shelter
So, this dungeon is basically running around in circles. Your primary objective is to keep talking to your party members over and over again, to advance the dungeon further. Just make sure to talk to everyone, every time, or it will take even longer. Watch out for the purple and red sludge on the ground, it will hurt you.After you repeat this process a few times, you'll begin a scene where your party members all go to sleep. Maya will speak to you while the other's are tuckered out. When you go to sleep, you'll see a flashback scene in your dreams.In the morning, you'll wake up with your head in Ginko's lap and Maya will initiate a conversation about how to get out of here. The following are the "correct" dialogue choices for her questions:1. "You don't know where the exit is."
2. "There was one person."
3. "A mirror."
4. "Everything in range."
5. "You can see things indirectly."Nothing bad happens if you answer these questions wrong, they just ask you again.Once the cutscene is finished, you'll be in Kasugayama High Basement once again.
Thriivan's Walkthroughs
Kasugayama High Part II
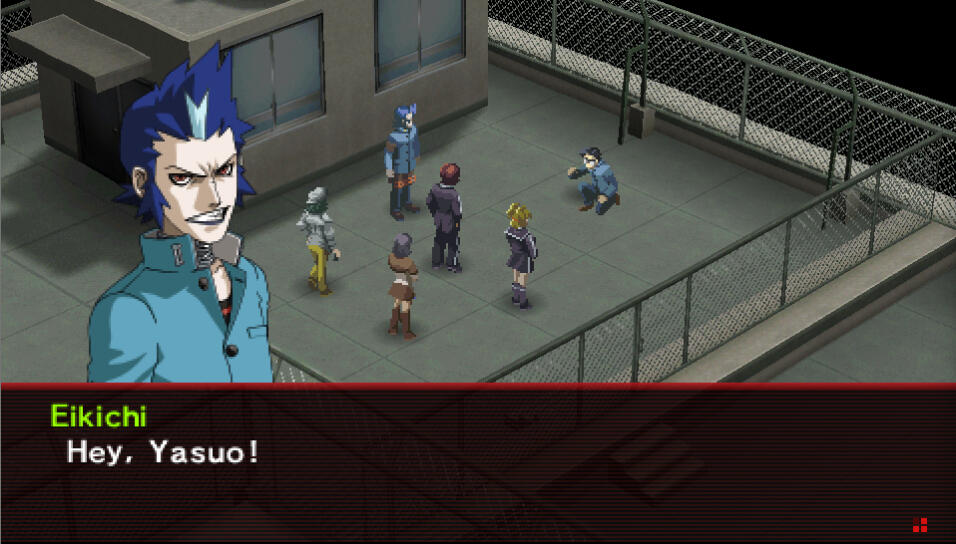
First things first, make your way to the Gym Entryway on 1F, and speak with the Masquerade committee member to obtain Masquerade Mask.Next, just head into the Gym through the nearby doors for a cutscene.Next, the Bukimi Rumor. Head up to 3F, and speak to the Effeminate male student to learn about the Bukimi Rumor.This is exactly the same as the Hanako quest. So just exit the dungeon, head to the Kuzunoha Detective Agency in Hirasaka and spread the Bukimi rumor. Then, just head back to Kasugayama High and run around until you encounter Bukimi (another toilet enemy, this one is pinkish brownish) as a random encounter. After you kill it, you'll receive Bukimi's Nametag, and you can bring it right back to the same kid on 3F. He'll reward you with Soma x5, which is a great item. Quest complete!Moving on, before you continue make sure you do everything you want to here, such as grinding or tarot card collecting, because you will be locked out after you do this next step.Head to 4F and go through the door to the Roof on the other end of the hallway. You'll witness a cutscene, and then it's boss timeBoss: Yasuo: This boss is incredibly easy. He is weak to fire and absorbs water and ice.After you defeat him, you'll see another cutscene, and you'll have control again on the Hirasaka map. Next, it's time to spread rumors again!
Thriivan's Walkthroughs
Spreading Rumors Part II
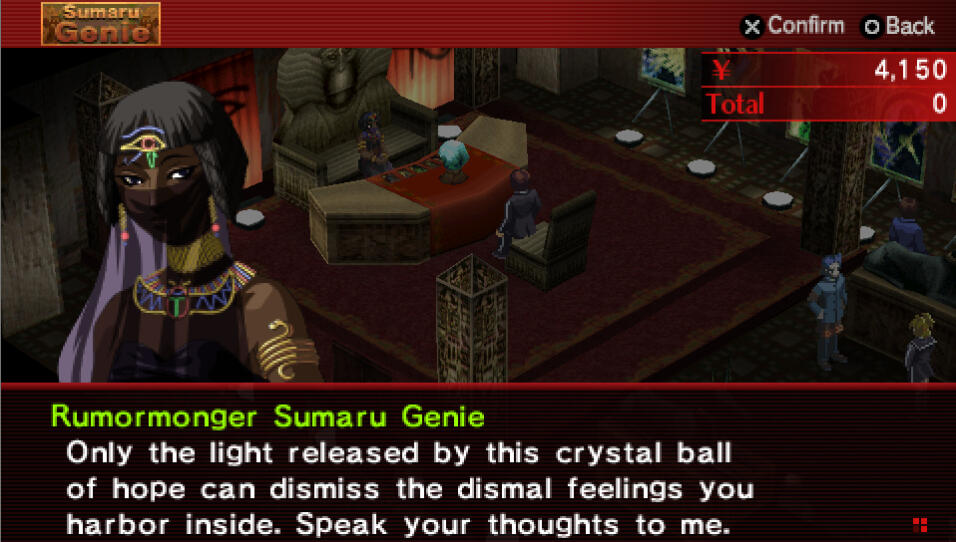
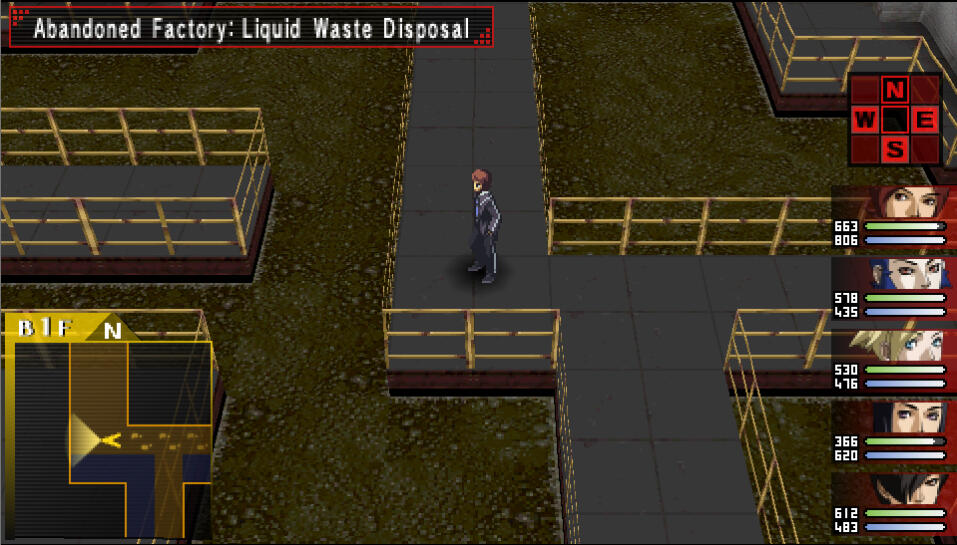
Now that you're in control again, our first stop is going to be Kameya Alley > Gatten Sushi since we're already in Hirasaka anyway. Speak to Toro and repeat the rumor exchanging process that you did last time.Next is going to be Rengedai > Honmaru Park and you'll see a strange scene. When in control, speak with Toku and get his rumors.Next stop is going to be Yumezaki > Yumezaki Center > Peace Diner and speak with Chikarin. Make sure that you talk to her normally and not just ask about the rumors. After speaking to her you'll have unlocked a new location on your map, Kounan.Head to Kounan > Kounan PD. Upon entering you'll see a cutscene. We're here to talk to the little boy in a yellow shirt named Little Chii. Talk to him, leave, come back inside, and talk to him again. This time he mentions the Dresser Hag by name.The dog statue here is just like the cat statue from earlier. 10,000 yen and it gets you some Incense, which permanently increase stats. But bear in mind, you will lose access to Kounan PD in a few more dungeons, so make sure to do this soon.Leave Kounan PD and head to Seaside Mall on the same map. You'll want to speak to Sumaru Genie. She's a new Rumormonger and she is required to continue the story. Ask her about rumors, do a fortune if you feel like it, but otherwise you can leave.Next stop is Hirasaka > Kameya Alley > Kuzunoha Detective Agency to spread some rumors. When you enter, there will be a scene that continues what the kids at Hanmaru Park spoke about. When you're in control, spread the rumors about the Dresser Hag, and the new item shop rumors.Obviously, you'll want to check out Tony's Shop and Anima Mundi in Yumezaki Center after spreading these rumors.The next stop is going to be Kounan > Abandoned Factory. This is a massive, optional dungeon that unlocks in segments. You do not have to explore the whole first room if you don't want to. We are only here to run into the Dresser Hag and kill her for Little Chii at Kounan PD. The key item you receive will be called Hag's Dresser. Go ahead and turn it back into him!Finally, back on track with the story, our next stop will be Yumezaki > Mu.
Thriivan's Walkthroughs
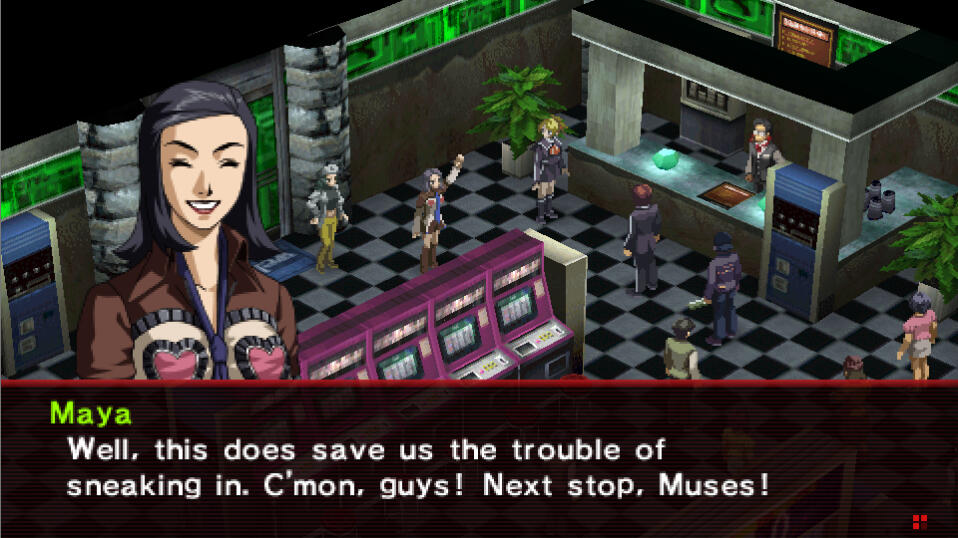
Mu
When you enter, a cutscene will play out. Just enter the door behind Eikichi and you'll be in the next dungeon.So, this dungeon is pretty linear overall. It just feels confusing. You're going to be going up and down stairs because the floors are divided into multiple sections. What you're aiming for is the Video Game Room on 4F. Just remember that once you enter that room, the dungeon will complete, so do all you need to before you enter.Okay, so on 1F when you first enter, you can go east or west, both lead to a staircase and a treasure chest. The chest to the east is empty, and the chest to the west has Rattle Drink x2.The stairs on the west lead up to 2F and 3F without any treasures, and it's a dead end. You can go up if you want to, just to explore but there's no other reason. Take the stairs to the east to 2F.On 2F, there is stairs leading to 3F on the mid west and stairs going back down to 1F in the southwest.If you head up the stairs to 3F, they will take you to another staircase leading to 4F. On 4F, there is a chest containing St Card. Now back track down to 2F again, and take the southwest stairs to 1F.There is a treasure chest here that just hurts you, so ignore it. There is another set of stairs to the south that lead to another part of 2F.On 2F again, follow the hall to yet another set of stairs down to 1F. The path heads south to another set of stairs. The treasure chest on the way makes you enter a battle with a special enemy. Take the stairs up to 2F yet again. Here, it's just stairs right up 3FOn 3F, its just around the corner for another set of stairs back down to 2F. Now it's straight ahead to 3F again. This is exhausting honestly.Just to the east of where you came up, there is a Trish's Spring. Just to the west is a chest with 10,000 yen inside. There is a staircase here leading up to 4F, and another one all the way east and south down the long hallway. Take this close one first. There is a chest just north containing Malaqua Card. That's it here. Head back down, and follow the long hallway I just mentioned to find the other staircase to 4F. Now, just follow the hall to the Video Game Room at the north end. Remember, once you enter, this dungeon cannot be returned to. Anything you want to do, do it now.When ready, enter the door. After the cutscene, you'll be back to the Town Map. Up next, Giga Macho.
Thriivan's Walkthroughs
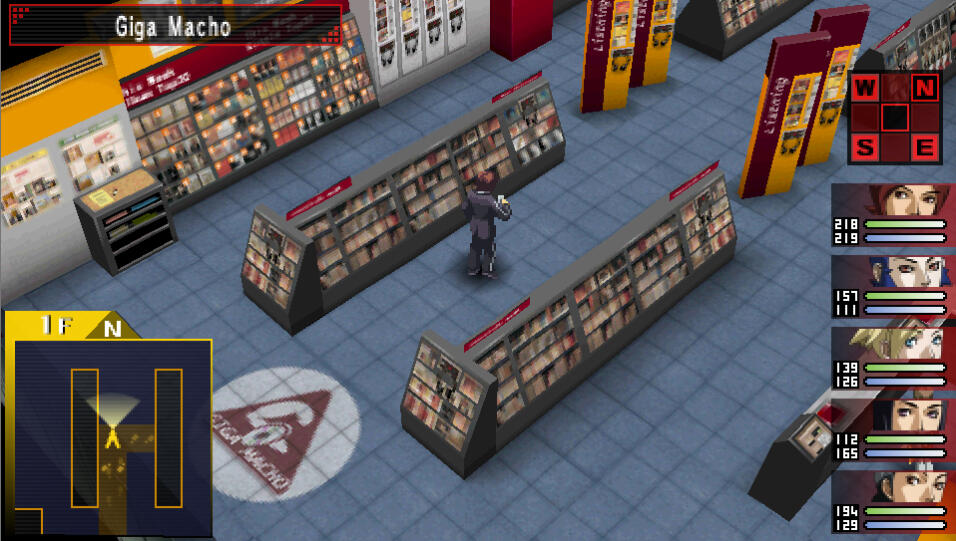
Giga Macho
When you enter, there is a cashier nearby where you can buy CDs. You can listen to them at Maya's residence in Kounan. Other than that, there's no treasures or anything, so you can head up to 2F via the stairs in the northwest.On 2F, around the center of the floor there is two boxes, one that is obtainable from the east and one from the west, divided by a barrier. The one on the east just hurts you. make your way around to the west side of the barrier and open it to find Chewing Soul x3. Make your way to the southwest and head north to continue on this floor. Take the little fork and you'll find the stairs to 3F.On 3F, the chest near the north is empty, you can ignore it. Just head all the way west on the north edge, and make your way down. you'll run into a treasure chest on the south end toward the middle that has a special enemy in it. If you head to the bottom edge and head west, there is another chest with a Physical Guard. Head back east until you find the elevator.First stop, ride the elevator to 2F. You'll find an Open Sesame in the box. Head back into the elevator and take it to 5F. Open the box right outside the elevator to obtain Jnana Mudra. Now take the elevator to 4F.On 4F, there is two boxes in the center of the floor. The west box is a special enemy that uses a bunch of instant kill spells over and over and it's very annoying. The east box contains St Incense. There is also two boxes in the northeast area of the floor. The east one contains Magical Guard. The west one hurts you. Watch out for the green spills on the ground, they also hurt you. Your goal here is to reach the stairs on the north end that lead up to 5F. When you're done here, go ahead and head up.The final room of this dungeon, FM Viewing Studio is to the west of you.Note: After this dungeon, Ginko/Lisa will be leaving your party for the next 2 dungeons.After the cutscene, you will be back on the Town Map with Ginko gone from your party. Before we head to Aoba Park, it's time to spread some more rumors.
Thriivan's Walkthroughs
Spreading Rumors Part III
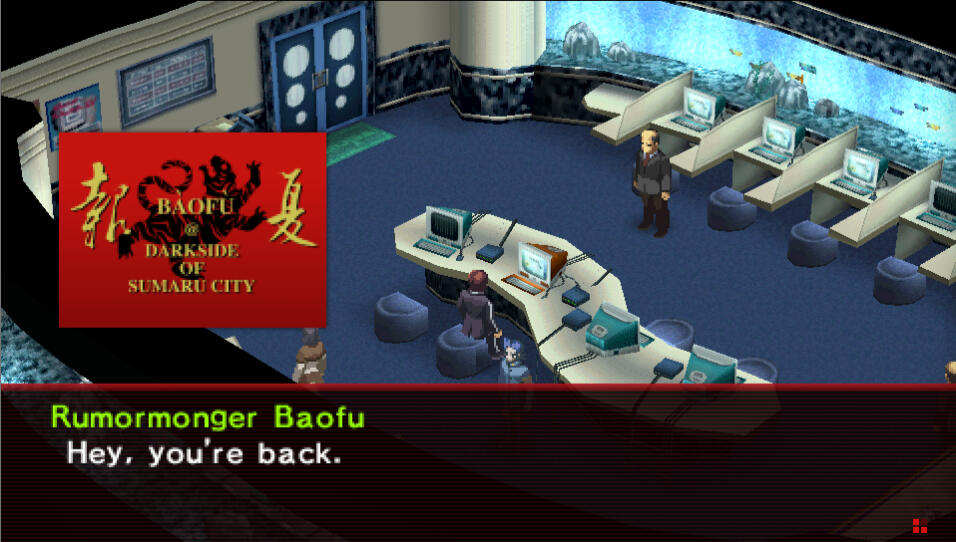
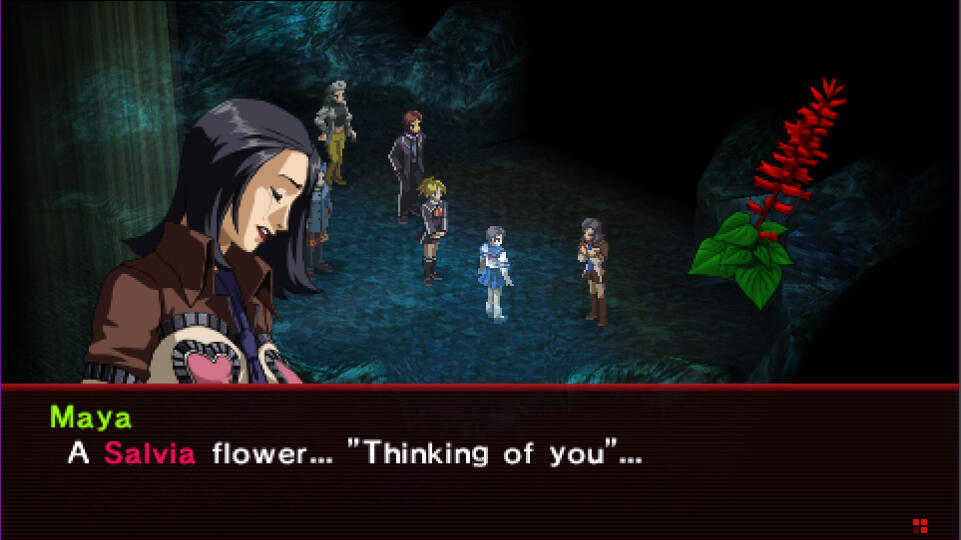
Starting off, we have a new location on the map: Aoba. Head there first. On the town map, you'll see a green NPC marker next to Aoba Park. Talk to this NPC to learn about talking flowers.Next, we're going to talk to every Rumormonger we know, but first, we now have access to our fifth and final one. Head to Aoba Way > Double Slash and hop on the brown/orange computer to speak to Baofu. Baofu is actually a playable character in the sequel, Shin Megami Tensei: Persona 2: Eternal Punishment. Anyway, ask him about Weapon shop and Armor shop rumors, the usual deal.Go ahead and talk to every other Rumormonger you know as well, as a reminder, they can be found at the following:Toku: Rengedai > Honmaru Park
Toro: Hirasaka > Kameya Alley > Gatten Sushi
Chikarin: Yumezaki > Yumezaki Center > Peace Diner
Sumaru Genie: Kounan > Seaside Mall > Sumaru GenieWhile you're visiting Hirasaka, also make a stop at Shiraishi Ramen and talk to the Maniac to learn about the Idol's Ghost rumor.As usual, once you're done gathering your rumors, head to Hirasaka > Kameya Alley > Kuzunoha Detective Agency to spread them.Make sure to check out the shops in Aoba now that you've spread those rumors. When you're ready, it's time to head to Aoba Park.
Thriivan's Walkthroughs
Aoba Park
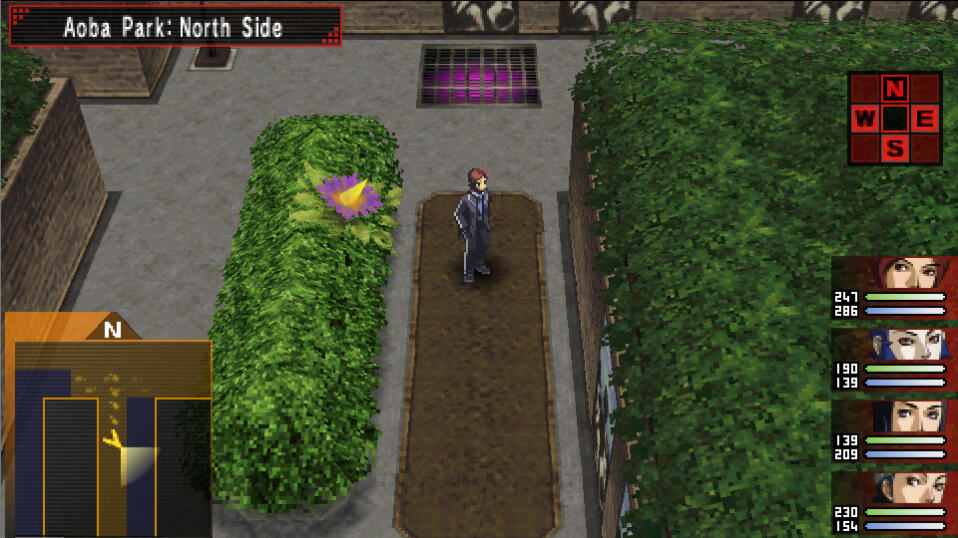
You start in Aoba Park: South Side, if you decided to start the Idol's Ghost quest like I suggested, keep an eye out for a random encounter named Linda. She will have an orange afro, a white, collared crop top, and an orange striped pair of bellbottoms on. She is weak to your regular attacks so she is pretty easy. When you defeat her, you will obtain the item Linda's Bra. Just make sure to exit the dungeon and turn the quest in to the Maniac at Shiraishi Ramen before finishing the dungeon, or you'll miss the opportunity to complete the side quest. Also keep in mind that if you spread the rumor about the talking flowers, you can speak to the flowers here for items.Anyway, here's your guidance for the dungeon:When you first enter, head east to the south east corner of the map to find a chest containing Antidote x2. Just FYI, avoid the glowing grates on the ground, they do damage to you. From this chest, head north a bit to find another chest containing Rattle Drink x3.From there, go ahead and head back west, going on the path that's north of where you first entered. On this path you'll find a chest containing Balm of Life. Keep heading west, then north, and follow the path back east again from there. You'll see the exit to the next area on the north edge, but before you go through there, there is one more chest east of it containing a Vi Card.Head through the north exit, and you're now in Aoba Park: North Side. Head west and north west to find a chest containing Rainbow Light.Okay so there isn't much at all until you head to the north and find a small path leading east. You'll find a chest containing Chewing Soul x3 just to the east of this little path. Head past the bushes to the north. You'll see a blue and yellow flower here, if you head a bit east and then all the way south from this flower you'll find a chest containing Kiku-Ichimonji, a katana. Return to that blue and yellow flower and head northwest and continue west. At the end of this westward path you'll find a chest containing 2 special enemies.Head north and it'll take you back east again. This path will turn north and you'll see a purple flower. To the west of this flower is a Trish's Spring if you'd like to heal up at an extortionate rate. From here, keep heading east to find the exit leading you to Concert Hall Rear Entrance. A cutscene will commence.When in control, go ahead and talk to the employees and you'll have to buy their badges for 10,000 yen. Enter the door to the Concert Hall dungeon.
Thriivan's Walkthroughs
Concert Hall
Upon entering, there is a door to the south very nearby. Before you head through, you can find Vi Incense down the hall. Heading through this southern door will lead you into a cutscene, and when that cutscene ends you'll be in the Outdoor Concert Hall Stage.Once you are there, speak to Michel and say, Let's wait and see what happens. This is another one of those character growth moments that we need Lisa/Ginko to handle by herself, like Michel did earlier. Once these cutscenes are over, you'll enter a boss fight.Boss: Prince Taurus: He is a bit tough but you shouldn't have too much trouble. Fire spells work decently well on him.After you defeat him, you're tasked with finding a riddle and you'll be given a 3 minute timer. Now is your chance to grab that Vi Incense if you missed it earlier. The timer only counts down in the hallways of the building, outside of battle. So you have more time than it seems. You'll find what you're looking for in the Concert Hall Dressing Room in the lockers. After you find the riddle, head to the northwest door of the Concert Hall to exit. Ensue a wild cutscene.In the dialogue, if you want to date Maya you'll want to choose Gently cheer her up and I'll protect you.Note about romance: Your only three options in this game are Maya, Ginko/Lisa, and
Thriivan's Walkthroughs
Spreading Rumors Part IV
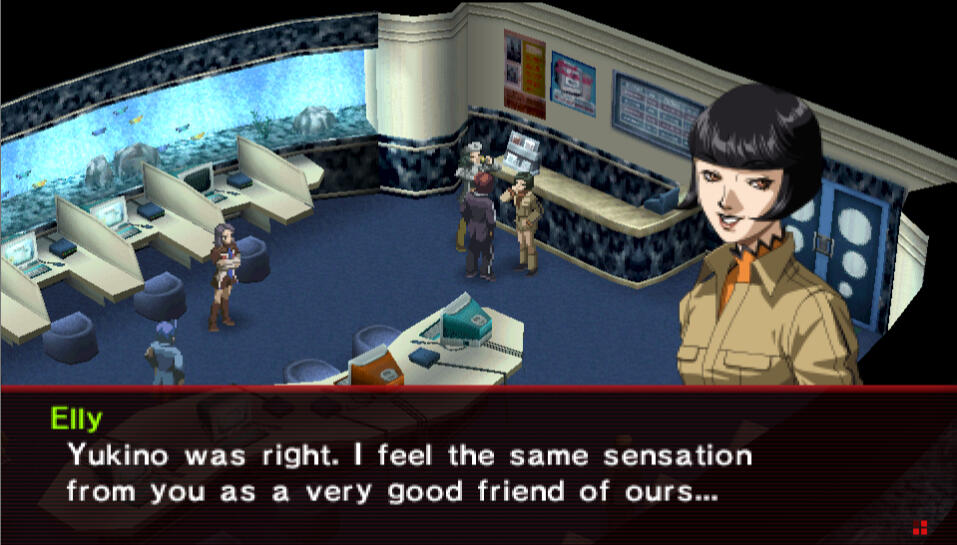
First thing you'll want to do is head over to Aoba Way > Double Slash to meet Elly/Eriko(from Persona 1). After a short scene with her, go ahead and contact Baofu at the computer and gather his rumors.Of course, the next step is to visit every other Rumormonger in the game and gather up info. As a reminder, you can find them in the following locations:Toku: Rengedai > Honmaru Park
Toro: Hirasaka > Kameya Alley > Gatten Sushi
Chikarin: Yumezaki > Yumezaki Center > Peace Diner
Baofu: Aoba > Aoba Way > Double Slash
Sumaru Genie: Kounan > Seaside Mall > Sumaru GenieThese are the last rumors that they have for you. As usual, head over to Hirasaka > Kameya Alley > Kuzunoha Detective Agency and spread those rumors around.A new room is available in the Abandoned Factory if you're interested. Otherwise, check out the shops, upgrade your personas at the Velvet Room, and when you're ready, it's time to head to Smile Hirasaka.

Thriivan's Walkthroughs
Smile Hirasaka
On the City Map go to Hirasaka > Smile Hirasaka. They'll ask you to confirm that this is the correct place you should be going. Say Yeah, let's check it out. and enter.Upon entering, you'll see a cutscene in the bathroom. When the cutscene is over, you'll have split up with everyone temporarily. It's okay though, because with Tatsuya all alone, you'll only encounter 1-enemy battles.So, you start on 4F. If you make your way to the west, then north, then east, you'll see two small hallways leading south. Each one has an chest at the end, you'll find Pipe Fox in the left one and Dx Incense in the right one.. You'll spot an elevator in the center of the floor as well. If you head to the west end of the floor you'll see some stairs leading down. Just a bit to the east of those stairs you'll find a chest containing Chewing Soul x3. Head down the stairs to 3F.On 3F, take note that there is another staircase leading down right here. Head straight north to find a chest containing Tranquilizer x3. In the hall just to the to the southeast of this, there is a door leading to a Trish's Spring if you need it.Head back to where you began on this floor and you can head what's basically straight east until you find a fork going north and south. Take the south path to a dead end and you'll see Maya. Talk to her to get her to join you again.Return to that same fork and head north this time. In the intersection you'll find a chest containing 30,000 yen. To the northeast of this chest is another stairwell that leads down. It's really up to you who to ger first, but basically the northeast stairs bring you to Yukki and the west stairs bring you to Ginko.Ginko: From 3F, head down the western stairs to 2F. All there is on this floor is access to that elevator near the northeast and another western staircase leading down. Take the stairs to 1F. On 1F, if you head straight south from the stairs you'll find Ginko to return her to the party. There is nothing else here other than that same elevator again. Head back up the stairs twice to 3F.Yukki: From 3F, take the stairs in the northeast that lead down to 2F. On 2F, immediately to the southeast you'll find a chest containing Maragi Card. Just northwest from the stairs is another chest, this one containing Energy Drink x3. That's it, head down the stairs to 1F, which contains nothing, so head straight down the stairs again to B1F. From the stairs, head to the southeast corner to find Yukki. The crates are in the way so you have to sort of go west to go around them first. Head back to 3F.Now that you have all 3 girls back in your party, Head back up to 4F and return to the Women's Bathroom in the southeast to see a cutscene with the Cleaning lady and Michel.Boss: Belphegor and Ixquic: I would recommend taking them on one at a time. Ixquic is weak against swords and holy. Belphegor is weak against magic. This boss is pretty easy over all, but it is stronger than previous bosses of course.After the fight, you'll see another cutscene and return to the City Map. Next stop, GOLD.
Thriivan's Walkthroughs
GOLD
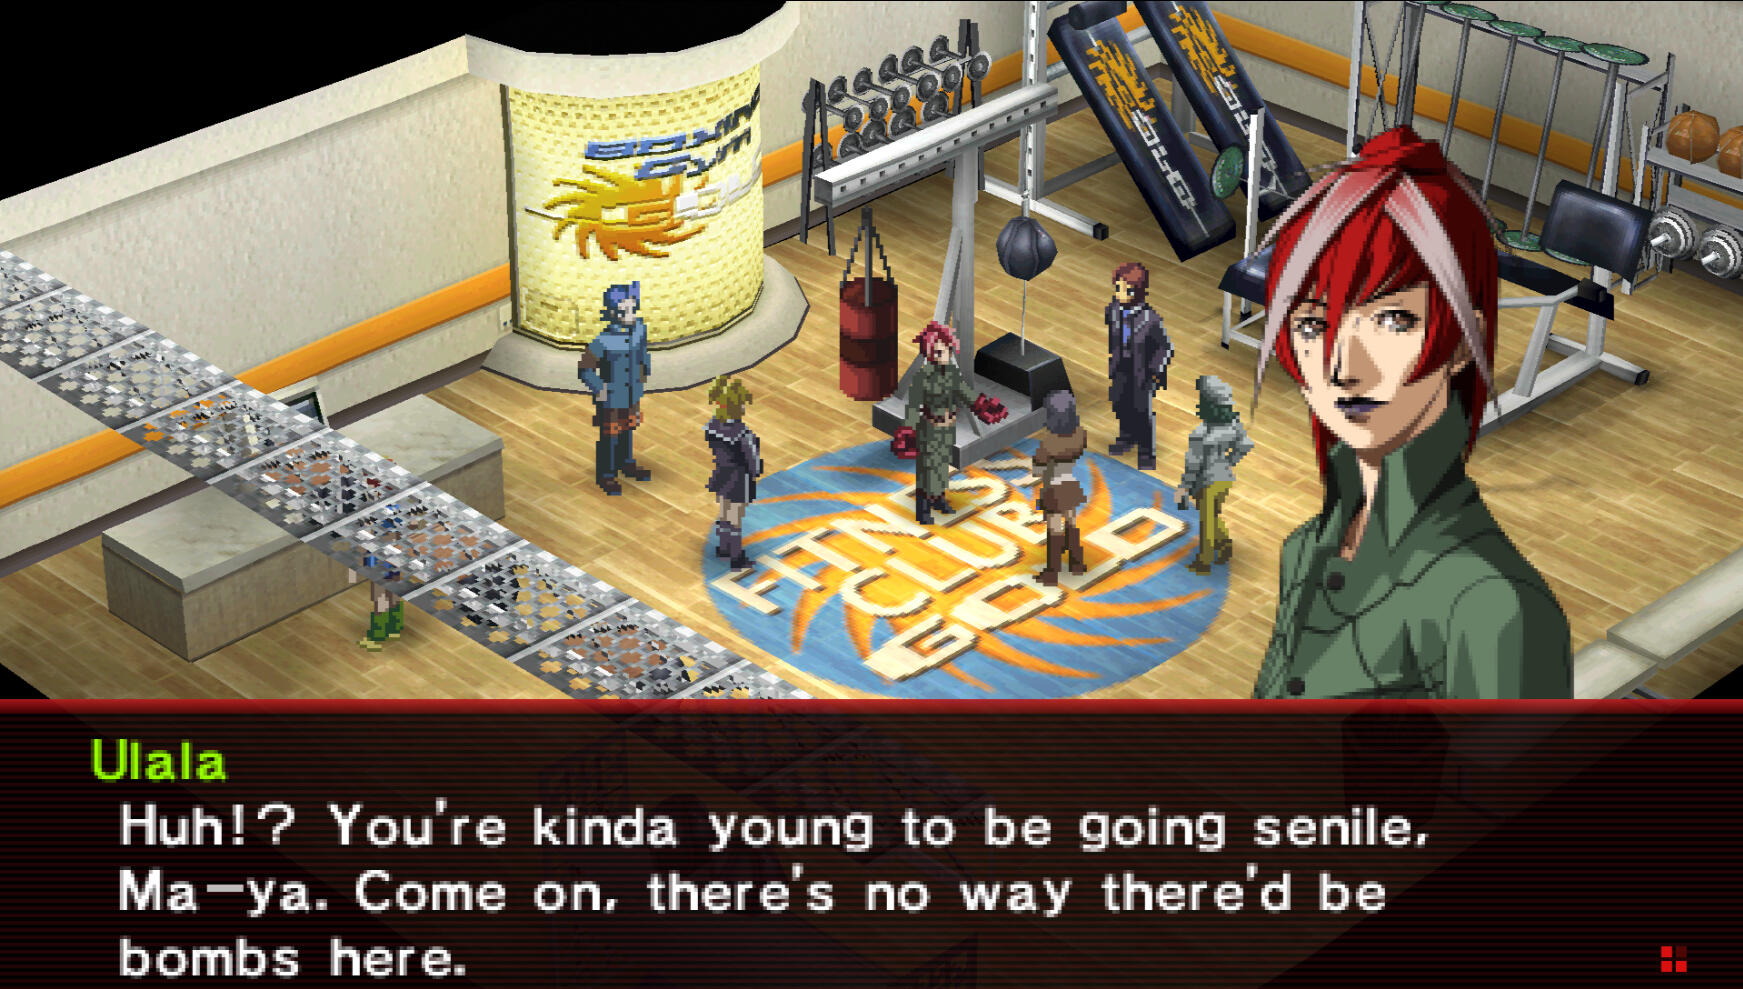
So, before you head to GOLD, make sure you get yourself new gear if you need any, and hit up the Velvet Room to see if you can upgrade your personas at all.Optional: Side Quest RumorsCursed Taxi: Head to Yumezaki > Yumezaki Center > Peace Diner and speak with the girl nearest to Chikarin. After some dialogue, she'll ask you if it was scary, tell her Not at all, and you will gain a new rumor to spread. As usual, go spread the rumor at Hirasaka > Kameya Alley > Kuzunoha Detective Agency. You will find this enemy at Kounan > Abandoned Factory. You'll obtain the item Taxi Hat. Turn it into Fuyuko back at the Peace Diner to complete the quest.Cursed Escort: When you turn in the Cursed Taxi quest, Fuyuko will tell you about a new rumor about a Cursed Escort. Do the same thing again that you did for the Cursed Taxi quest, this time the item will be Yacht Hat. Turn it into Fuyuko and you're done.When you're ready head to Yumezaki > GOLD.Upon entering, You'll see some cutscenes and meet Maya's roommate Ulala. Once the cutscene is over, go ahead and exit through the door.You start on 1F. In the northwest corner, in the Women's Locker Room, you'll find a locker containing 50,000 yen.Just to the east of that is the Men's Locker Room, where you can find Ag Incense.In the northeast of the map, enter the Supply Closet to witness a small cutscene. Speak to everyone and then leave. When you are ready, head up the stairs in the southwest corner.On 2F*, there is not much to see other than 2 rooms in the northwest corridor. Enter the Supply Closet to witness a similar scene to last time, and again, speak to everyone and leave. Next enter the Trainer Room just to the south of this.In the Trainer Room, speak to everyone again. Upon speaking with Ginko, a small cutscene will happen. Go ahead and leave the room, and head to the southeast portion of 2F to find stairs leading up.On 3F, you can find an All Card in the Women's Dressing Room in the northwest. Just next door, in the Men's Dressing Room, you will find a Mediarama Card.In the southwest is Trish's Spring.To the east, you will find two Staff Rooms side by side. Enter the Men's Staff Room for the next cutscene. Now, you can either re-enter the same room and speak to everyone, or enter the Women's Staff Room for the same exact dialogue. Either way is fine.So, where did that guy run off to? All the way back to the Boxing Gym, the room we started in on 1F. Head back there, obviously. You'll witness a cutscene and you're done! Next stop, the Aerospace Museum.
Thriivan's Walkthroughs
Aerospace Museum
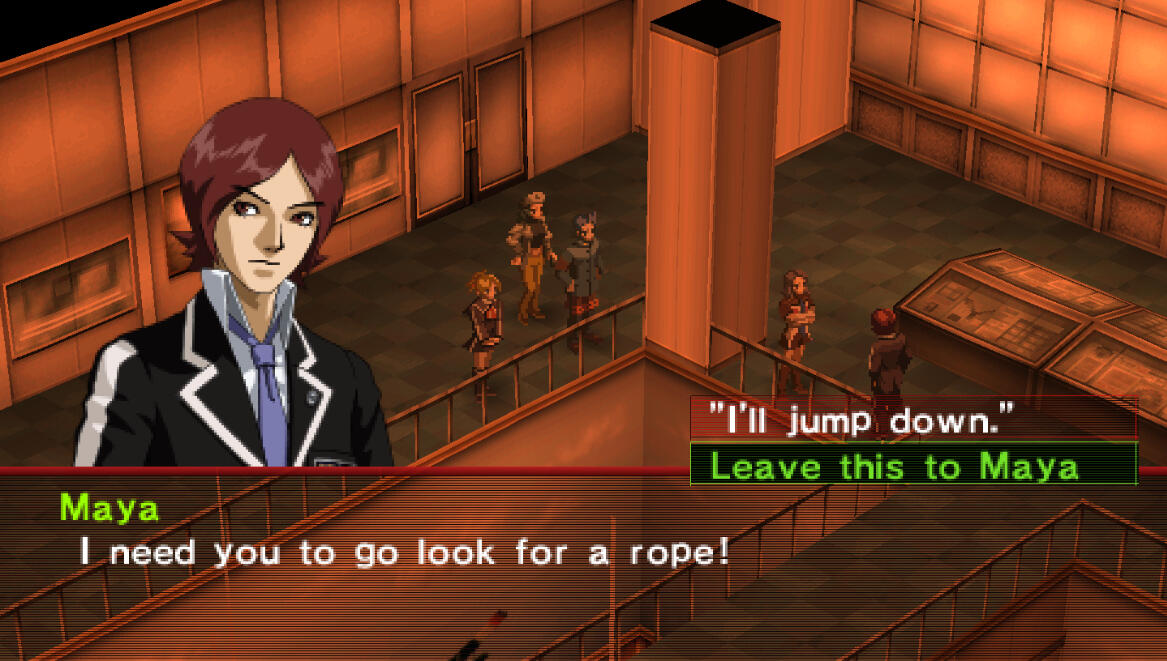
Head to Kounan > Aerospace Museum, and enter. Once inside, a cutscene will play right away.You're on a 10 minute timer. There are no enemies right now, just find all the children, and head up to the next floor. Each floor will not allow you to continue until you find all the kids on that floor. Go ahead and head straight to 2F to the northwest to begin.Once you're on 2F, head east to find Dx Card and then back west from the stairs, finding Revival Bead x2 along the way. Then head south to the southwest corner, then back east to the 3rd door to find the first group of children. Next, find the Catwalk Anteroom just to the northeast of here before advancing to the next floor. In the Catwalk Anteroom you will witness a cutscene with a dialogue choice that is required to obtain Maya's Prime Persona later on. As always, select Leave this to Maya. After the cutscene, exit through the same door Ixquic left from to advance. The stairs to 3F are just to the west.On 3F, there will be one group of children in the southwest and one in the southeast. The reach the southwest group of children, head all the way north, then west, then all the way south. After you get them, if you have extra time, head just to the east and make your way north to find Lu Incense. Head back to the center of the floor where you saw the stairs going up.Head all the way to the east as far as it will let you. If you head north it will lead you to a weapon for Michel, True Force. Heading south leads you to the next group of children.After saving both groups of children on this floor, head back to the center of the room, and up the stairs.On 4F, you will witness a short cutscene. Afterward, you will now be facing random encounters. Maya suggests running from battle to save time, but the clock actually stops while you're in battle, so there is no need to worry about it. There will be two groups of children on this floor. The first group can be found in the northeast, picking up a Miracle Egg along the way. The second group can be found to the southwest. As you make your way there, Maya will stop you and mention that King Leo is nearby. This is because you are close to the next staircase. Keep heading west, and a bit northwest to loop down and find the last group of children. Head back to the staircase you passed and head up to 5F. This is literally just the roof access, so leave through the door to enter a pretty big and important series of cutscenes. Once in control, you'll be in the Airship Bridge. Talk to everyone, then leave to enter a boss fight.Boss: King Leo: He is weak against Water so just keep healed up and spam water on him and you should be able to win very quickly.After the boss is defeated, watch some more cutscenes, and you're done here! While we're at it, let's Spread Rumors a bit more.
Thriivan's Walkthroughs
Spreading Rumors Part V
First, make your way to Rengedai and speak with the NPCs on the town map nearby Mt. Iwato. One will tell you about the Kuchisake-Onna Rumor.Next head to Hirasaka > Kameya Alley > Kuzunoha Detective Agency for a cutscene. After the cutscene is over, spread the Kuchisake-Onna Rumor. Afterward, pay a visit to Shiraishi Ramen and Toua Defense, they should have new weapons and armor in stock for you.If you care about the Abandoned Factory, the door to Room #4 should be open now too. After you are done grinding, or visiting the Velvet Room, etc. head to Rengedai > Alaya Shrine for an important cutscene. That wraps it up, next up, is Mt. Iwato.
Thriivan's Walkthroughs
Mt. Iwato
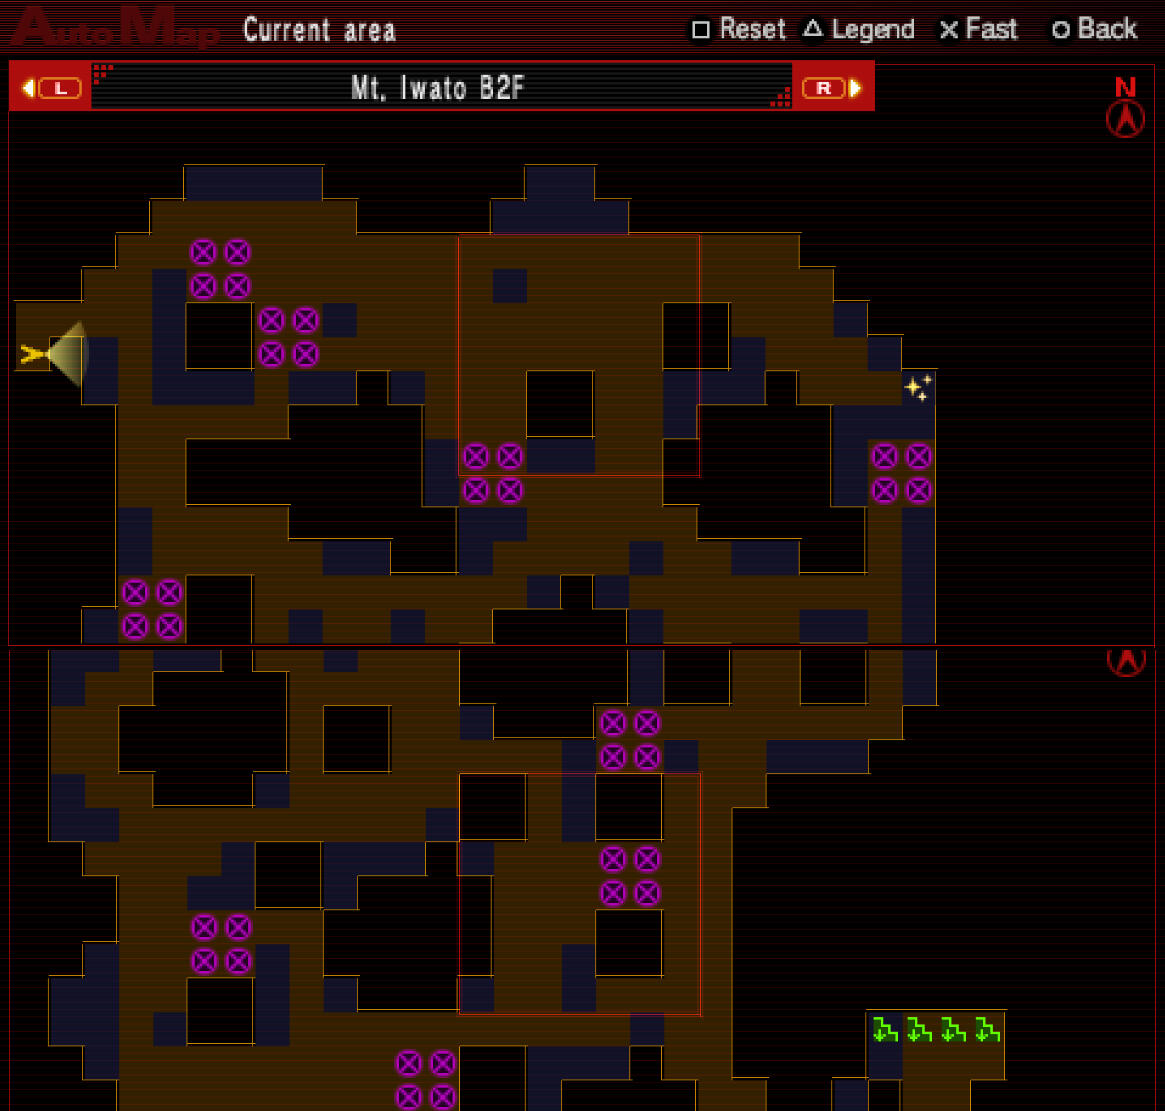
You'll begin on B1F. Once you enter you'll find yourself in a cave. It is worth noting that there are 4 Masks for you to find throughout this dungeon. One for each of your party members. These masks are required to get each of the Ultimate Personas for your party. The Prime Personas that we have been working toward come first, and the Ultimate Personas will be obtained later on. It is also worth noting that something is up with Maya and she will not be able to contact demons while you're in this dungeon.First though, if you spread the Kuchisake-Onna Rumor, you should run around until you encounter her. She is wearing a white trench coat and red heels, and wields a small scythe. After defeating her, she will drop Kuchisake-Onna's Mask. Head back outside and give it to the same NPC that gave you the rumor to retrieve your reward, a Megido Card.As you head into the dungeon you will very quickly run into a room with a quick scene. After the scene, speak to everyone and continue forward to.From here, make your way around the curve until you find an HP Incense on the left/west side. Then continue east/south to find a Reflecting Pool. You will witness an important flashback scene here. Once the scene is over, talk to everyone, and head out the other entrance behind Yukki.Head directly east until you run into a secret room. This is where you'll find the first mask, Pink Azas mask. Exit the secret room and head north until you hit the fork at the top. Head left first to find a box containing Ohnusa x2. go back to the fork and head right to find the second Reflecting Pool. Another flashback plays of course. Speak to everyone and continue through the exit by Maya.Head south from here and slightly east to find the second Secret Room that contains the Yellow Owl Mask.From here, make your way west. hug the walls north and you'll quickly run into the third Secret Room which will contain the Red Eagle Mask. Just a bit south of this room, you will find a Muscle Drink.Head west from the same area and follow the path north between the torches and you'll be transported to B2F.B2F: This floor is going to be annoying. So, there are a lot of pitfalls traps everywhere and it makes you fall to B3F every time you fall into one. There are also a lot of secret hallways on this floor that don't appear on the map until you walk through them. Look for caves on the walls to find them. If at any point you fall in a pitfall trap, look to the B3F section below.So, you start in a small little area that has nothing except a secret tunnel on the east side. Head through to the other end. Just north of where you come out, you'll find a Trish's Spring if you need it. Head north from here to find another hidden tunnel and follow it north.When you exit, you'll now find yourself in the area I was talking about that has pitfalls everywhere. The image below I got from Google, so thanks to them for that. This shows where all the pitfalls in this area are so you can avoid them. I highly recommend using it for reference so you don't have to fall down a million times. In the northeast you'll find Bead x2. Other than that, just make your way to the northwest corner to move on to the next Reflection Pool and another important flashback. Exit out the other end. At this point, I'm moving the next B2F and B3F instructions below the image below to keep things easier to follow.B3F: Watch out for the glowly cracks, they will hurt you. To the east you will find Tranquilizer x2. A bit north of this along the east wall is the stairs leading back up to B2F. To the north you will find a box containing a special enemy, Demon King. Around the center you will find Miracle Egg x2. To the west you'll find Energy Drink x2. To the southeast, over some damaging cracks, you'll find Antidote x2.
B2F Part 2: After you leave this reflection pond, you'll be heading south. Keep going straight south to find the fourth Secret Room containing the fourth and final mask, Blue Swan Mask.If you continue to the east you'll see stairs leading down to a different section of B3F than you previously explored. Head past it to find 30,000 yen then head down the stairs.B3F Part 2: Just to the east you will find Revival Bead x2, and a bit further east from there is a fifth Secret Room that is supposed to be where the Black Falcon Mask should be located. Talk to everyone if you like, but go ahead and head west from where you came down and keep following the path until you find stairs leading down to B4F.B4F: follow the linear path until you see a secret tunnel on the north wall. Before you enter, you can grab an Ogre Hand from the chest just to the southwest of here. Head north through the tunnel. this will lead you to the final Reflecting Pool of this dungeon. This is your last chance to collect the 4 masks, tarot cards, treasures etc., so if you have anything else you would like to take care of, now would be the time. When you're ready, go ahead and enter for some important cutscenes, and a boss fight.Boss: Shadow Maya: You start this fight with low health. She spams aquadyne a lot, so just heal up regularly and you should be fine.After the fight you will watch some more important cutscenes, and congratulations, you just earned your Prime Personas!After these insane cutscenes, exit and you'll be back in Rengedai. Lotus should have new stock at Time Castle and Rosa Candida. Take some time to visit the Velvet Room and the Abandonded Factory now if you need to. This would be a great time. Up next, Mt. Katatsumuri.
Thriivan's Walkthroughs
Mt. Katatsumuri
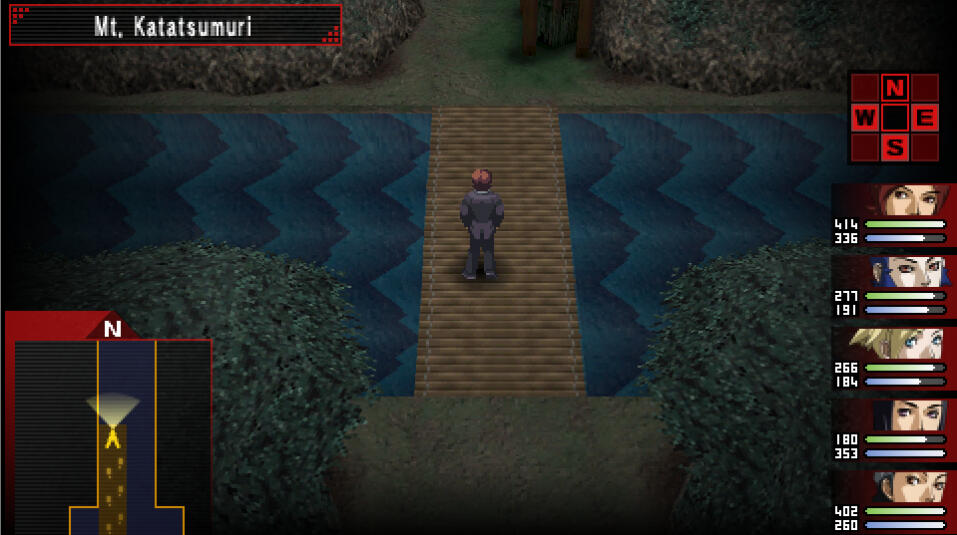
The City Map now has an option to go to Mt. Katatsumuri so, it's damn easy to find. Enter at the Mt. Katatsumuri Entrance obviously, and when you are asked whether to bust right through or go around, choose Bust right through. If you choose to go around you will be tasked with a frustrating maze dungeon. Busting through gives you a straight forward path of screens where you just fight and move forward. Choose whichever you wish, but once you make your decision, you cannot change it.Once you are through, regardless of which path you chose, you will find yourself at a fork. One way leads to the Peak and one leads to Gotetsuji. Head to Gotetsuji first. After some more wild cutscenes and a fight, you'll be in control again. Speak to everyone, of course.Now, the logical thing would be to go back out to the fork and head to the Peak; however, the devs decided to place a missable rumor out there at this point in the game, so you'll actually have to make your way all the way back to the entrance just to go get it. I know, it's tedious. Obviously if you don't care, just go toward the Peak path.So, there is now a Hiker outside on the Town Map, talk to him to hear the Jumping Geezer rumor. As always, head to Hirasaka > Kameya Alley > Kuzunoha Detective Agency and speak to Chief Todoroki tp spread the rumor. Then head all the way back into Mt. Katatsumuri and enter the Peak path, and run around until you encounter the Jumping Geezer as a random battle. He will literally be an old man jumping up and down with springs on his feet. Then, take the Jumping Geta that you received all the way back out to the Hiker again for a Holylight Card.Anyway, whether you did the quest or not, it's time to move on. Head west at that fork toward the Peak path. This route is also very linear until you reach Area 4, for this just keep left at that first fork and make your way north.Once you reach the north end of Peak Area 4 you'll find the stairs up to the Caracol Entrance. When you enter, you will immediately be shown a cutscene. A dialogue option comes up for you to have a teammate with you, or fight the boss alone. What you choose doesn't matter story-wise, so pick whichever you like.Boss: Longinus #11, #12, or #13: Basically, depending on who you chose, you will fight a different one of these 3 gundams.
Maya/Michel > #11: Weak to Water
Ginko/Yukki > #12: Weak to Electric
Tatsuya > #13: Weak to FireAfter the boss, you have a very important dialogue option, so be very careful here. Answering correctly grants you a new persona and also determines the outcome of an important event in the next dungeon.Respond You'd deny his last request....? to answer correctly. Once the cutscene is over, you can speak to everyone and then enter the actual Caracol dungeon. I would recommend entering and immediately leaving to the Town Map. You now have access to use the cable car to bypass the 16 screens of chaos that you were previously using to get in and out of here.This is a great time to take care of anything you have been needing to do, like checking out the Velvet Room, the Abandoned Factory, or go shopping, etc. When ready, enter Caracol.
Thriivan's Walkthroughs
Caracol
B1F: As you enter the Caracol dungeon, keep an eye out for the glowing floor panels that will hurt you. If you head west and follow the hallway north you'll find a chest that hurts you, so uhhh don't open it, keep heading to the northeast corner, and then continue east to find a second chest containing a St Card. You may have noticed there is a some blocks that obstruct the hallways in this dungeon. Head back to the entrance and take the same pathway on the east side, this floor is symmetrical. The first chest you see contains Energy Drink x3. The chest you will find toward the end of this pathway contains 45,000 yen.Keeping in mind that this floor is symmetrical, you should know that there is a sort of "room" in the center of the floor that connects to the bottom, top, left, and right of the floor. If you go north from here you'll find an elevator that you can't use yet, and if you go east from here you'll find a set of stairs leading down. Obviously, take the stairs.B2F: From the stairs, head all the way east, then south, then back west until you see a path leading north to the center of the room. This whole spot here is a bit of a floor puzzle, but it's pretty simple overall. I took a screenshot of the map to make it a little easier. On the east end of the puzzle, the chest contains All Incense. Make your way to the west end of the puzzle to move on.
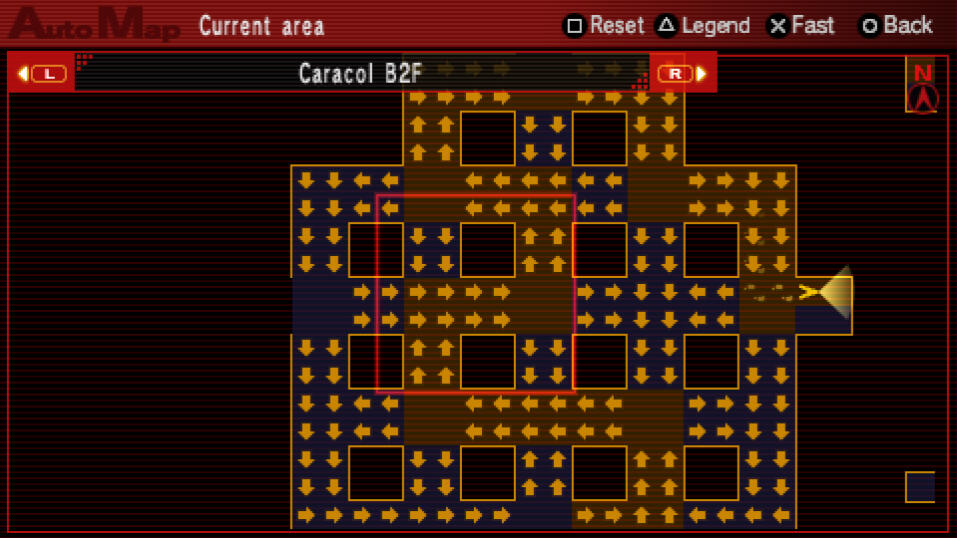
The next area you encounter to the west of the moving walkways is another similarly laid out waffle of a room, but this time it has teleporters. These appear like little red tornados on the map. On the left end of this "room" you'll find one of these teleporters embedded in the wall, step into this one to be transported to the center and open the chest there to find Achilles Helm. You'll have to walk into one of the teleporters to get back, it'll take you to the moving walkway area again. Make your way back to the teleporter area and head to the north end of this area, take a left at the fork, and follow this hall as it turns south and leads you to a door to Stella Hall to move on. Upon entering, you'll be thrust into battle. It's not a boss or anything, just a regular ol' battle. Talk to everyone, and move through the next door. From here, there is just a small stretch of hallway and the stairs leading down to B3F. Take them.B3F: This floor seems confusing at first until you begin to fill out the map. The basic gist of it is, you can find 4 treasure chests, one in each quadrant of the map. The treasures are as follows:Southwest: Balm of Life x2
Southeast: Succubus Battle
Northwest: Antidote x3
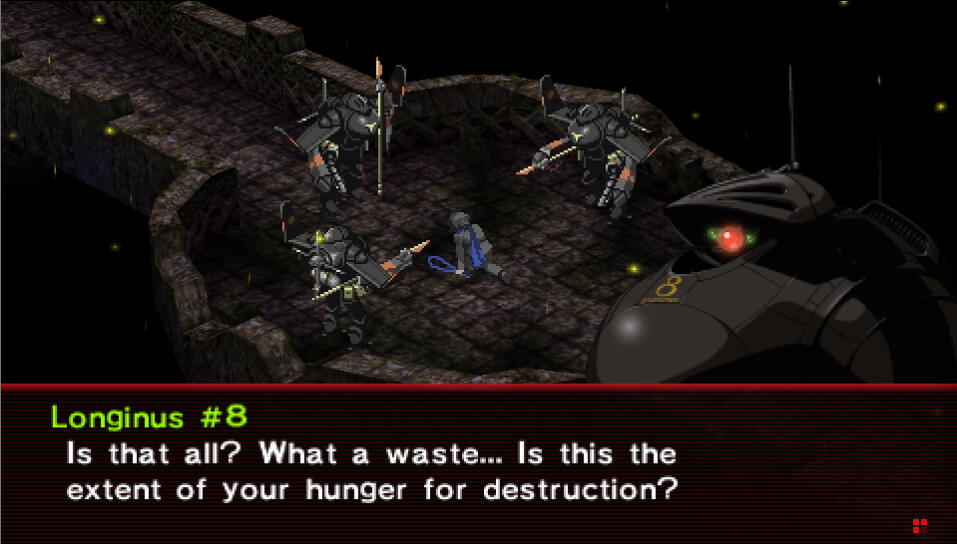
Northeast: Tranquilizer (I hardly know her) x3As always, avoid the glowy danger zones on the floor that will hurt you. In order to advance, you need to head to the northeast quadrant and enter the middle teleporter of the 3 there.It will take you to a small hallway with another teleporter, enter this one next obviously. This leads you to another linear hallway with some stairs leading you down to B4F.B4F: When you take one step, Yukki will say something. Head north and you'll find a door straight in the middle and a treasure chest to the east and west. Open the west one to find Dekaja Card. The one on the east just hurts you. Enter the door.A cutscene will play out, immediately followed by another Longinus boss fight.Boss: Longinus #8, #9, and #10: This battle is just a mini boss like before. Longinus #8 is weak against Fire, #9 is weak against Electric, and #10 is weak against Wind. Use this knowledge and the battle will be fairly easy. Just note your regular attacks won't do much, stick with magic.After the battle you will witness a cutscene with Anna. When the scene is over, Yukki will have left the party.After the cutscene, you will find yourself on the other side of the bridge to continue exploring B4F. To the east there is a Trish's Spring and nothing else. Just to the northwest are the stairs leading down to B5F. There are a few treasures on this floor to obtain first though. Just a bit north and west of the stairs you'll find a chest containing Bufula Card. A bit to the east of this is an elevator that Maya won't let you use, and to the northeast is a Samakaja Card. When you're ready, take the stairs down.B5F: From where you start, south leads nowhere. Head north and take the fork west and back south real quick to pick up Estoma Card from the chest. continue east from that fork to follow a pretty linear pathway. When heading east you'll see a door leading to a room called Stella Hall. Enter for another important scene. Exit the other side of the room and continue down the linear hallways. You'll find Bead x3 along the way, followed by Miracle Egg x3. Keep following the path and you'll eventually be led to a second Stella Hall. Enter when ready for another scene.After the cutscene, continue down the linear paths. You will encounter a chest that leads to a special battle with Yaksa along your way. Eventually you find the stairs leading down to B6F.B6F: This floor looks a bit confusing due to the forks and whatnot but overall it's actually just a spiral. So just make your way around the floor counter-clockwise. There is a treasure chest in each corner of the floor. They are as follows:Southeast: Achilles Boots
Northeast: Ag Card
Northwest: Achilles Armor
Southwest: SP IncenseAfter you open the southwest chest, head east along the southern wall and Maya will say something. Keep going and head north into this new area to find a door that leads to Rings of Time. Enter.After some big cutscenes, you will enter a boss fight.Boss: Joker: He actually isn't too hard at all. Just keep whackin' at him and heal up and it's just that simple.After a quick scene, it's time for the real boss fight, and for some reason Yukki is there again.Boss: Angel Joker: This is also not too hard, but he will periodically insta-kill some of your party members so just do your best to revive people and heal up and you'll whittle down his health.After a series of cutscenes, you now have your new goal and new personas. You'll be in control of yourself again at Alaya Shrine. Talk to everyone, and then leave.Up next, it's time to Spread Rumors one last time.
Thriivan's Walkthroughs
Spreading Rumors Part VI
First up, you should head to Aoba > Sumaru TV and speak to the Pale Man by the desk. Just like before, Head to Hirasaka > Kameya Alley > Kuzunoha Detective Agency and speak to Chief Todoroki to spread the Kudan rumor. This is our final rumor and will take place in Room 05: Storage in the Abandoned Factory. Kudan will look like a weird four legged brown-ish creature, idk how to describe it. He has an annoying move called Prophecy that kills him, but it resets your currently equipped personas back to Rank 1 so it's up to you whether or not you want to just deal with it or try to save first and keep trying to defeat him before he uses that bitch ass move. Anyway, the item you receive is called Kudan's Head. Go ahead and take it back to the Pale man for your reward, which is a heaping hot load of nothing. Literally nothing. But you finished all the rumors quests now! Whoo!Next, we're going to go on a lil shopping spree. Check out the shops in Yumezaki, Aoba, and Kounan.Yumezaki > Yumezaki Center > Tony's Shop and Anima MundiAoba > Aoba Way > Clair de Lune and Rosa CandidaKounan > Seaside Mall > Jolly Roger and London ClothierI recommend looking at everything first and making your decisions after the fact. I got all my things from Jolly Roger and London Clothier, but they only sell women's shoes, so I got the 3 men's shoes at Rosa Candida. This is also expensive so if you don't have enough money I would just buy what you can, grind at the Abandoned Factory, and repeat until you have everything you need. I only had around 1 million ¥ at the time and had to grind for another million. I found my best bet was Room #5. It only gives around a few thousand ¥ per battle but it was the best I could find. You can always try gambling but I didn't enjoy it at all. I figured leveling while grinding for money was more worth my time.When you're ready, we're heading to the Zodiac Temples.
Thriivan's Walkthroughs
Zodiac Temple I: Aquarius
Aquarius Temple can be found in Hirasaka. Once you're all stocked up and ready, head on in.1F: Upon entering, if you head west first, you'll find a Tetraja Card against the west wall. The path straight down from this chest leads nowhere, but if you take the other path just to the east all the way south, you'll find Magical Guard x3. If you head just northeast of this chest, you'll find the stairs leading you to 2F. The entire east half of this floor contains no treasure at all, so it's fully up to you whether to explore it or not. When ready, head up the stairs.2F: Once again, you can ignore the entire east half of the floor. There is a chest over there but it contains nothing. Keep note that there are occasional pit fall traps on this floor, but if you just hug the walls you should be fine. Anyway, from the stairs, if you head just a bit south, west, and make your way to the to the north west, you'll see a colorful door on the east side of the hall as you're heading north. This is a Relief Hall. There will be a battle upon entering. After the battle, examine the relief carving, talk to everyone, and continue out the opposite side to continue exploring the floor.From here, go ahead and make your way south at the first available turn and you should find a chest containing St Incense. Make your way back up and head further east, and follow this all the way south until you see the stairs leading up.3F: If you head all the way south to the wall, you'll find a chest containing 50,000¥. That's essentially it for this area before moving forward. Just to the northeast of the stairs you came up on, there is another colorful door with a Trish's Spring. To the north of the stairs, and west of the spring is another Relief Hall. Enter for another battle, and once again, speak to everyone before moving on. The inscription on the relief carving is the same as last time.Once you go out through the opposite door, head all the way west until you hit a wall, then make your way south. Once you hit a wall again, head west, and south again. you should be able to find a chest containing a Dx Card if you continue as south as you can go, then southeast. The eastward pathway just to the north of this chest will lead you to your destination, the Aquarius Room. Get ready for a boss fight against more Longinus enemies. Make sure Jun is equipped with his Hermes persona before the battle.Boss: Longinus #5, #6, and #7: These mechs are a bit higher rank so they'll be stronger than last time. #5 is weak against water, #6 is weak against wind, and #7 is weak against lightning. They resist all physical attacks, so just still to your 4 main elements and you should be fine.After the battle is over, you will see some important cutscenes, and be returned to the world map. Make sure to heal up, fuse personas, etc. Speaking of the Velvet Room, you should now be able to mutate Hermes into Chronos for Jun. You must unequip the persona first to do it. When you are ready, we're headed to Yumezaki.
Thriivan's Walkthroughs
Zodiac Temple II: Scorpio
Scorpio Temple will be found in Yumezaki. Make sure you're all stocked up on a dickload of SP items and ready to go, then enter.So, quick rundown: this dungeon is full of these annoying ass puddles that will deplete your SP. Unfortunately, you have to cross some of them in order to progress. Once you step on them the first time, they disappear though, so that's nice. This place is also quite a labyrinth of stairs going up and down, over and over again. Most of it is just empty hallways full of those annoying puddles and treasure boxes containing nothing, and some that just hurt you. So, I'm just going to show you the easiest/fastest way through, stopping at the only treasures you can get on the way.1F: Go ahead and head straight north to the stairs leading you to 2F.2F: Follow the path west until you encounter a Relief Hall. Go through, fight the enemies inside, talk to everyone if you like, and advance out of the other end. From here, head north and east to the stairs leading you to 3F.3F: Follow the only path you are able to until you hit a fork with one path leading north and one leading south. Head north to find the following treasures: Bead x3 right: Miracle Egg x3. Return to the fork and follow the path south until you hit another fork. This fork is just a rectangle that reconnects, but you'll want to make a quick detour for another treasure. Take the south side of the fork and you'll see stairs leading back down to 2F along the north side of the hall. Go ahead and go down.2F: Follow the path and you'll find a Trish's Spring. Keep going and you'll find some stairs leading you down to 1F.1F: follow the pathway until you find a fork, head west and follow the path leading you further to the west. Head down this little hallway to a dead end with a treasure box containing a Megidola Card. The other treasures on this floor just hurt you, and require you to cross those SP-draining puddles, which is so rude. So, go ahead and back track the way you came all the way back to 3F.3F: Continue west, and head west at the fork. You'll eventually come up on the Scorpio Room. Make sure that Michel/Eikichi is equipped with his Hades persona before entering.Boss: Shadow Eikichi: This fight seems simple enough, just don't use Ice, Water, or Nerve. He is weak to Light. Nothing particularly stands out other than that, so just keep whittling him away and keep your health up.After the battle, and some more cutscenes, you'll find yourself on the world map. Heal up, stock up, and do anything else you feel you need to do. Next up, Taurus Temple.
Thriivan's Walkthroughs
Zodiac Temple III: Taurus
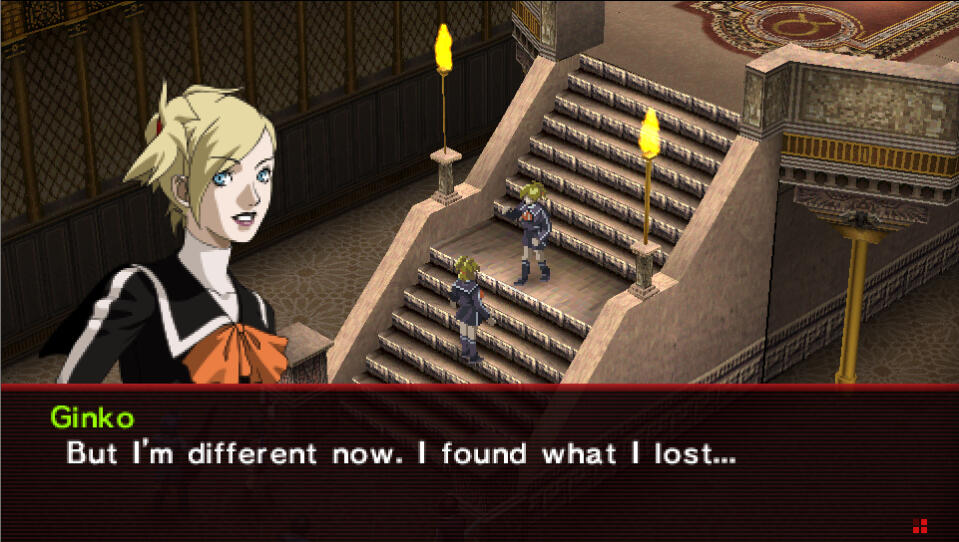
Taurus Temple can be found in Kounan. Make sure you're all stocked up and ready before you enter, as always.1F: So, this floor is pretty big. There are 2 chests here but ignore them both. One is empty and the other one hurts you. A bit east and south there is stairs leading up to 2F, and further to the east in the far southeast of the room there is another set of stairs leading to 2F as well. Take the east ones.2F:, right stairs There is a treasure box to the southwest but it just contains a monster. If you head north you'll find a Relief Hall. Before you enter here though, head northeast of the Relief Hall to find a set of stairs leading to 3F. It is a small room containing Miracle Egg x3. Head back down the stairs to 2F and enter the Relief Hall. Fight the enemies and advance to the other side. There is now moving sand on the ground that you have to maneuver around. Head up to the north end of this area to find a Healing Card. Make your way to back south, to the east of where you first entered this area. Head down the stairs here leading back down to 1F.1F: This area contains one set of stairs leading up to 2F in the northeast, another in the northwest, and a Trish's Spring between them. Head to the stairs on the east.2F: Easy floor, just head straight south to find the stairs leading you to 3F.3F: This floor is FULL of motherfuckin' sandy conveyor belts. If you make your way east until you see sand moving north, follow it up. Now, head all the to the northeast corner to find Balm of Life x2. Follow the sand moving back south to where you just were. Now, head as far west, then south, then east again as it will allow you. You should come upon 3 different sandy conveyor belts again, all of which head north. Take the middle one and then the right one. Just north of here is the Taurus Room which holds the boss. Make sure Ginko/Lisa is equipped with her Venus persona before you enter.Boss: Shadow Ginko: She nullifies Earth, Dark, and Mind. She is strong against Electric, Nuclear, and Nerve. She is weak to Light. This fight should be pretty quick with the above in mind.After the battle, the cutscenes will prompt you to respond to Ginko about her feelings for you. This doesn't actually have an effect on the plot at all, but will unlock a special Group Contact with the person you choose. However, since this is supposed to be based on your romance, choosing Eikichi will do nothing at all. When finished, you'll find yourself on the world map once again. Last stop, Leo Temple.
Thriivan's Walkthroughs
Zodiac Temple IV: Leo
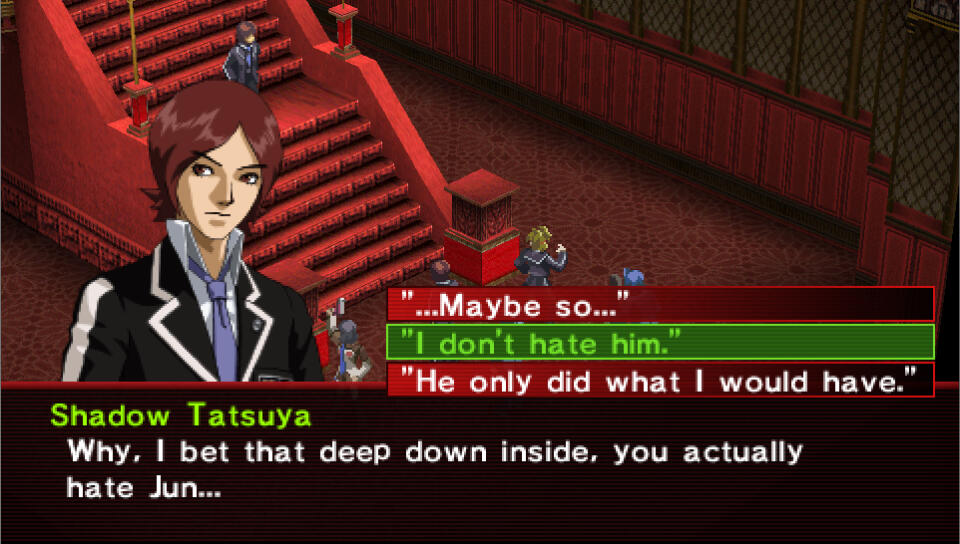
Leo Temple will be found in Aoba. Make sure you're all healed and stocked up and enter.1F: This floor is pretty large, but if you make your way to the far north you'll find a chest containing Dordona's Oar. This will let you summon a new persona in the Velvet Room. There is stairs leading up to 2F to the east and north of this chest. Head up them.2F: Make your way west, then south, then east to find Vi Card. Go ahead and ignore those stairs to the northwest, they go nowhere. Head back down to 1F.1F: From here, head southeast and follow the first path south to find a chest containing 50,000¥ Return the way you just came and head southwest, passing the chest you opened earlier until you find stairs leading to 2F. along the north wall on the far west. Head up.2F: When you enter, just follow the path southeast and you'll find a Relief Hall. Once you defeat the enemies inside, emerge from the other end. As you explore the floor, you'll find two sets of stairs leading up to 3F. One in the northeast and one a bit west of this, even further north. Head to this northernmost one, the east stairs lead to nothing.3F: When you come up the stairs, you should see a Trish's Spring nearby. This area is a straight path south to a Relief Hall. As usual, enter, defeat the enemies inside, talk to everyone, and advance out the other end. Head east and take the first pathway leading north. Head through this awkward little halls northwest to find a chest containing Ohnusa x3. Return to the first main hallway you came from. Make your way to the far west, then as far northwest as you can go, then head east. You'll find a Physical Guard x3 along the southside of the hallway as you continue to head east toward the boss. The Leo Room is just beyond the chest. Make sure that Tatsuya is equipped with his Apollo persona before you enter.When you enter, the cutscenes before the boss fight will have a dialogue option regarding Jun. If you pick the second or third response, you'll obtain a new Group Contact with him.Boss: Shadow Tatsuya: He fully nullifies Fire, Nuclear, Dark, and Mind. He is strong against Electric and Nerve. He is weak against Light. Don't worry, he's just as easy to fight as the other Zodiac bosses.After the fight, you'll witness some important cutscenes and then you'll find yourself on the world map again. Next up, it's time to get some Legendary Weapons. If you don't care about this, feel free to skip straight to Silver River.
Thriivan's Walkthroughs
Legendary Weapons Part I
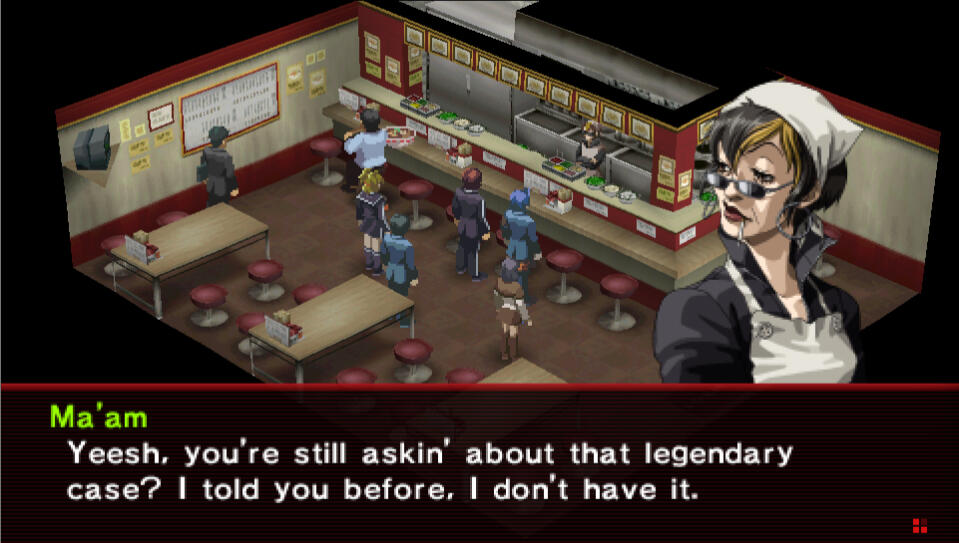
So, the general gist here for these first two is that you can go around to whatever dungeons you like, and form pacts with demons by raising their happiness meter. After this, in future battles you'll want to raise the happiness of the same demons you've made a pact with. Ask them to give you information.First, Michel: Eventually one of them should tell you a rumor about a legendary weapon being sold at Shiraishi Ramen. Once you have this rumor, you'll head to Hirasaka > Kameya Alley > Shiraishi Ramen, speak to Ma'am, and make small talk. Next, you can head to the Kuzunoha Detective Agency and spread the rumor. Now, head back to Shiraishi Ramen for a scene between Ma'am and Eikichi. IMPORTANT: You must select the first dialogue choice "Good luck." otherwise you just wasted your time doing this and you get nothing. After he's finished eating the ramen, you can now buy the Legendary Case weapon from her for 500,000¥. Yay!Now, before we move on to Maya, it should be noted that these Ultimate Weapons stand out from other weapons in this game, because you can make them stronger by doing the same process to get rumors. There will be four rumors about them having earth, water, fire, and wind powers, one rumor about it being extra strong, and one really rare rumor about it being dogshit. Unless you keep scaring them you don't have to worry about that last one anyway. So, as you search for the future weapon rumors you will see these rumors popping up as well now. These rumors cancel each other out, so pick whichever one you'd like to spread, but I recommend the ones that just make them stronger in general, not the elemental ones. These weapon-enhancing rumors need to be spread by the demons themselves, so once you get the rumor you want, you need to do the same process of raising their happiness to ask them to spread it.Maya: Same process, but this time we are looking for a rumor about a legendary weapon sold at Clair de Lune. Once you eventually get this rumor, you'll do the same thing as last time. Head to Aoba > Aoba Way > Clair de Lune and speak to Garcon Soejima and make small talk with him. Now head back to Hirasaka > Kameya Alley > Kuzunoha Detective Agency and spread the rumor. Next, back to Clair de Lune for a scene with Maya and Garcon Soejima. IMPORTANT: Make sure you tell Maya to "Eat it." in order to get her weapon, obviously. After the scene, you can now buy the Legendary Gun from him.Jun: Okay, so this one doesn't become available at all until you have completed the two before this. Once you have both of the above weapons, head to Rengedai > Alaya Shrine. There is a hidden little boy behind the shrine. Talk to him to hear about a note on a bulletin board at Honmaru Park. Head there next, it's also here in Rengedai. When you enter, the bulletin board is in the back corner to the right of the shrine itself. Read it to learn about a legendary flower at Time Castle. Head to Lotus > Time Castle which is also in Rengedai. When you enter, a scene will start. Next, it's time to hit up those same five rumormongers from before. As a reminder, they are the following:Rengedai > Honmaru Park > Toku
Hirasaka > Kameya Alley > Gatten Sushi > Toro
Yumezaki > Yumezaki Center > Peace Diner > Chikarin
Aoba > Aoba Way > Double Slash > Baofu
Kounan > Seaside Mall > Sumaru Genie > Sumaru GenieSo, they all tell you pretty different rumors. You're going to have to return to Hirasaka > Kameya Alley > Kuzunoha Detective Agency and choose which rumor you would like to spread. The following is what will happen for each one:Count is trying to raise the price: It will be sold at Time Castle for 800,000¥.Dealer is at the abandoned factory: The dealer will be found in Room 04 of the Abandoned Factory, selling it for 500,000¥.It was stolen by demons: Random encounter with a Fenrir in the Liquid Waste Disposal room of the Abandoned Factory which you don't even have access to yet in the first place, so I don't recommend it.It has already been sold: This one just straight up makes it unavailable, don't do this lol.The Count gave it as a gift: He gave it to Maki Sonomura(from Persona 1). If you let Principal Hanya live at the beginning, she will be found at Yumezaki > Yumezaki Center > Tony's Shop. If not, then she will be in Rengedai > Seven Sisters High > Class 3-B. After you find her, she'll give it to you for free! For the cause or whatever. Also, Hidehiko "Brown" Uesugi, and Eriko "Elly" Kirishima from Persona 1 should also be with her with their new looks if you played the first game and are curious.That's it for now. Unfortunately, you have to wait a bit longer for Ginko and Tatsuya's weapons.I recommend doing the process of making these weapons stronger before you advance into the next dungeon. Other than that, congration, you done it.Next and last dungeons, Silver River and Xibalba.
Thriivan's Walkthroughs
Silver River
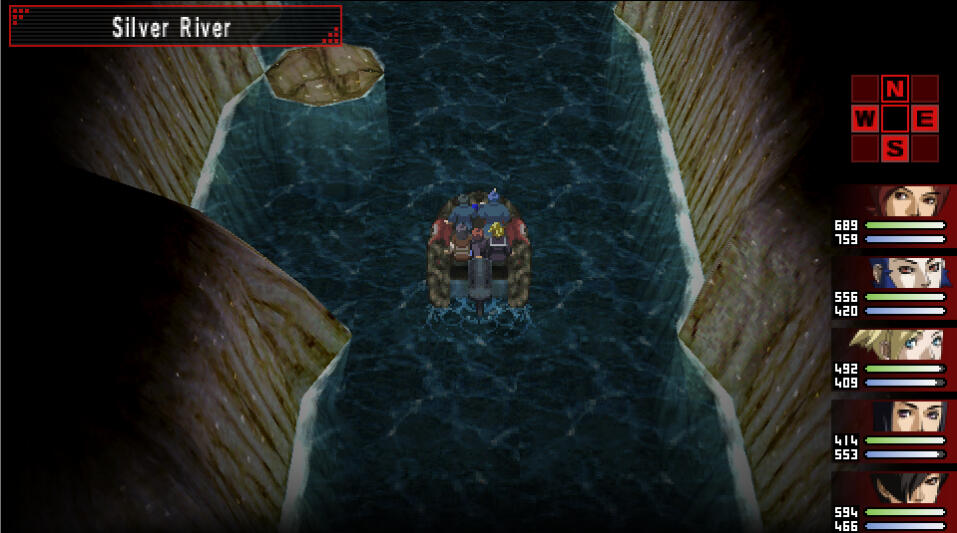
At this point in the game, there are new weapons and armor over at Rengedai > Lotus > Time Castle and Rosa Candida. Please note that if you did the quests for the Legendary Weapons that the non-upgraded versions of these weapons will be weaker than what the Count has on sale, but the upgraded versions will be stronger. So, I highly recommend doing the upgrading process to make them worth your time.Please note: Once you begin this dungeon, you can't leave for a long time, so do everything you want to now. Also, once you start this dungeon, it brings you straight into the following dungeon, which is the final dungeon of the game.When you're ready, head over to Rengedai > Seven Sisters High. Go straight ahead into the courtyard and examine the Narurato Stone. You will be immediately transported into the Silver River dungeon. You need to go the correct directions in order to make it through, or else you'll be stuck here for a while. The correct directions are going to be: straight, right, left. So just keep those directions in mind, and you'll just have periodic battles along the way. Pretty simple really.When you reach the end of this dungeon you'll be asked about lasers and a superheated room. Your choice matters but only a little bit. You will see a scene involving both, you're basically just picking which one will come now and which one will come later. You're now Inside Xibalba.
Thriivan's Walkthroughs
Inside Xibalba Part I
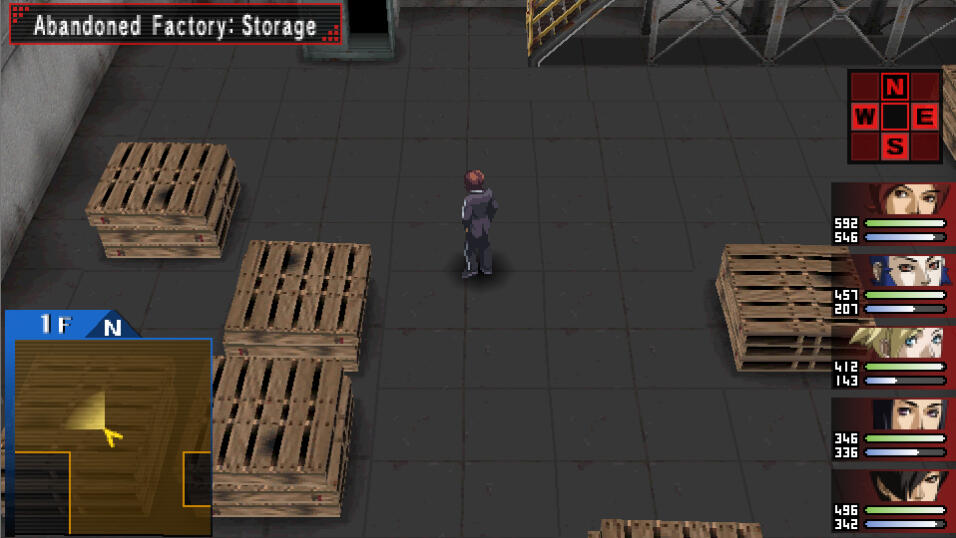
So this dungeon is going to be relatively linear. The enemies here are strong so our main goal here is going to be getting to B5F because we are stuck inside this dungeon until we get there.B1F: So, right away you can't go anywhere except straight north into the Imix Hall for a cutscene. When the scene is over, talk to everyone, and advance through the other side. From here you can't really go anywhere except east and south, but just make sure you don't miss the chest containing Open Sesame x2 to the northeast on your way south, and on the west as you head down you'll also find Silver Manisha x2. Just south of this chest you'll notice a little floating and rotating prism overhead, this is signifying where the "stairs" are, or in this case a floating lift (look at the map). Go ahead and take it down.B2F: Go east and north up the small path to find a Lu Card. Now make your way to the west side of the lift you came up on to find an Ag Card. That's it for this half of the floor. Make your way north and a little east and you'll fix the next room, 'Ik Hall. Enter for another cutscene. After you're done here, continue through the other side. From here, make sure to pick up the Physical Guard x3 on the west, and keep heading south. Keep west at the small fork here, and pick up the Magical Guard x3 in the corner. Just to the east is your ride down to the next floor.B3F: Another simple layout, just head north, grabbing the Vi Incense and the All Card on the west. Enter the Ak'bal Hall on the east for another cutscene. This one should be the second scene from the lasers vs heated room debate from earlier. You'll automatically appear on the other end when the scene is over. Just south of where you came out, ignore the westward path here. You may see 2 chests, but one is empty, and one just hurts you. So, just head south instead. Keep to the east side of this path because there is an explosive trap next to the cube thing as you head south. You'll be lead to a another room, K'an Hall. Enter for another cutscene. Talk to everyone as usual and exit through the other door. if you head northwest from here, you'll find a Dx Incense, just be careful of the pink glow on the ground, it'll hurt you. The lift to the next floor are right there to the east.B4F: There is nothing south, so head straight north. When the path turns west, make sure to grab the Brink Tea on your way. The path sort of splits going north, west, and south here, go south first to grab a Vi Incense. After that, take that westward path and then turn south at the fork and you'll be led to the lift for the next floor.B5F: This is the floor we've been waiting for. There will be a few points of interest here. Go north into the door to Chickchan Hall and watch the cutscene. After it's over, you will have access to a Trish's Spring and a Velvet Room (yes, actually). I do not recommend using the spring unless you absolutely have to because you're about to be able to return to town any moment now. When you're ready, exit this room on the other side and head east. You'll find an elevator that you can't use yet, the lift to the next floor, and a room called Terminal. Southeast of the elevator you'll find a Ag Incense, and northeast of the elevator you'll find Muscle Drink x3. Enter the Terminal. you'll immediately see a cutscene. After this is over, you will now be in Class 1-C of Seven Sisters High. You can now freely transport yourself back and forth from Seven Sisters High and Inside Xibalba, so you can finish any late game side quests, and do anything else you wish. It's time to get Tatsuya and Ginko's Legendary Weapons. (Or if you don't care, just skip straight to Inside Xibalba Part II)
Thriivan's Walkthroughs
Legendary Weapons Part II
You now have access to Abandoned Factory Room 06: Control Room, and along with it, you have access to both Tatsuya's Legendary Weapon and Ginko's Legendary Weapon. Let's get started.Head to Kounan > Abandoned Factory. What we need to do here is look for the 11th Note which is in the new room we have unlocked. These notes look like white sheets of paper with red text on them. I find this lore pretty interesting, so here is a full list of all the notes in order and where to find them, plus what to do to unlock the last few rooms:Note 1: Right in front of you on the floor at the entrance.Note 2: In Room 01: Service Entrance to the east of the second conveyor belt, sitting on top of some barrels.Note 3: In Room 01: Service Entrance. South and then west of Note 2, sitting on top of a stack of pallets.Note 4: In Room 02: Factory, in the far east on top of a stack of pallets.Note 5: In Room 03: Factory in the far northeast by a door that goes back to Room 02. It's sitting on top of some barrels.Notes 6 and 7: In Room 04: Office which is on the second floor. Head to the south end of this room and you'll find both Notes 6 and 7 sitting on top of some desks.Note 8: In Room 05: Storage in the far northeast. You have to take a snakey path between the overhead walkways to get there. It'll be on top of a barrel just south of the door that leads back to Room 03.Note 9: From Room 05: Storage, just north of Note 8, enter the door that leads back to Room 03: Factory. It will be in this little area on top of a stack of pallets.Note 10: First, head to Room 01: Service Entrance and head to the southeast corner, in between where you found Notes 2 and 3. There is a door here that leads to Room 05: Storage, enter here and you'll find it on top of a stack of pallets.Note 11: In Room 06: Control Room, ride the first conveyor belt and head east before you hit the second one. You'll see it on top of a computer.Okay, so before we move onto the last 3 notes, it's time to spread some demon rumors. Remember how we did this for the first legendary weapons and also to upgrade them? You're going to do this for this switchboard rumor now. As a reminder, you need to raise the happiness of a demon 3 times to make a pact with it. Then, in a future battle, do it again with the same demon, and ask them for information. Repeat until they mention the switchboard rumor. Then repeat again and this time, ask them to spread the rumor for you. It's tedious, but we need to do it.Once you spread the switchboard rumor head back to the second floor and enter Room 04: Office. All the way to the south, where you found Notes 6 and 7, you'll now see a new door that leads to Executive Suite. Enter, obviously.Notes 12 and 13: In the Executive Suite, both of these will be found on top of different desks.Tatsuya's Legendary Weapon: Speak with the man on the west end of the Executive Suite. Choose to tell him what's going on and he will give you Tatsuya's Legendary Katana. If you played Persona 1, you'll notice that this is actually Kei Nanjo.Up next, Note 14 and Ginko's Legendary Weapon. Head back out to the first floor hallway and you should fall through a hole in the floor just south of Note 1. You're now in the Hidden Room.Note 14: This final note can be found just northeast of where you land in the Hidden Room on the floor next to the desk. This is the final note.Ginko's Legendary Weapon: It's time to spread demon rumors again. You'll now be using your pacts to get information about a waste treatment plant at the factory. Once you have the rumor, have the demons spread it, just like before.Once you manage to spread this rumor return to Room 06: Control Room and head all the way south, and then west. There is a door here that was previously sealed shut. It now leads to the Liquid Waste Disposal. In this room you'll have to make your way up as far northwest as possible, then back all the way south as possible, then west, and allll the way northwest again to find a door that leads to Waste Treatment 1. This is our goal. Inside, you'll find Reiji Kido (from Persona 1). Speak with him, and say "Are you Kandori?" and you'll get Ginko's Legendary Gloves from him. If you are not aware, Kandori is the main villain of Persona 1. Reiji Kido is Kandori's half-brother.All that's left is to use demons to spread rumors about Tatsuya and Ginko's weapons and you're all set!You can do what you like, but it's about time to get back to the second half of the final dungeon.
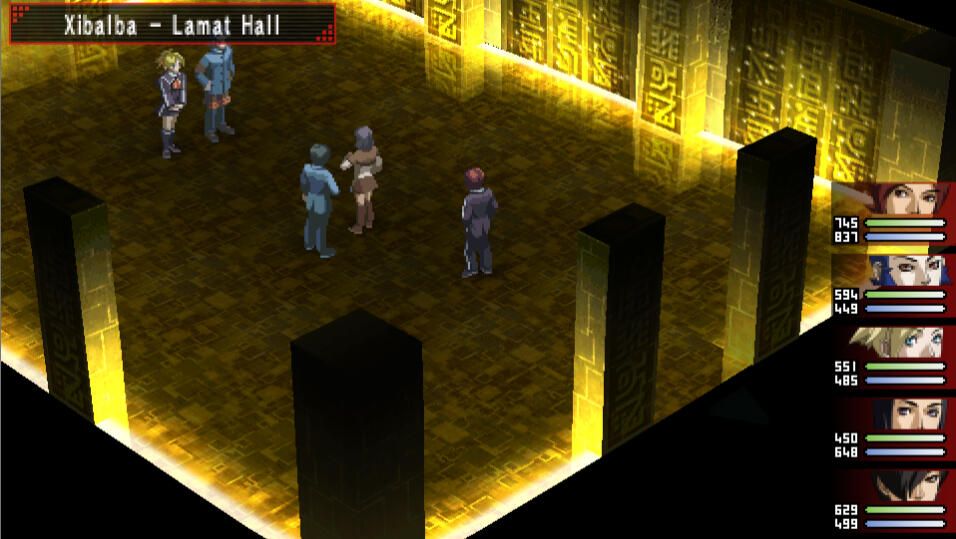
Thriivan's Walkthroughs
Inside Xibalba Part II
If you did the Legendary Weapons or left the dungeon at all, you'll need to return to Seven Sisters High > Class 1-C and use the teleporter to get back Inside Xibalba.B5F: Whenever you are ready, take the lift down to B6F.B6F: From the lift, head northwest to find Energy Drink x3. If you head a tad south and then west, avoiding the red-pink floor tiles, you'll find a enemy chest to the west, and a chest containing Antidote x3 to the south of it. East from here you'll find the door to the Kimi Hall. Enter for another cutscene. When you're finished, talk to everyone and advance. Once through, head north. You'll see a chest to the west as you head up. Avoid the red-pink floor tiles and open it to find Tranquilizer (I hardly know her) x3. Keep heading north. Head east real quick to grab Ohnusa x3. The chest to the northwest contains nothing at all. Take the west path and look along the northern wall to find the Manik' Hall and enter for another cutscene. During this scene, you'll be prompted to agree with either Jun, Eikichi, Maya, or Ginko. This determines how long B8F will be. If you pick Jun it's just long for no reason, and if you pick Maya you'll miss out on treasure. So, I'm going with Eikichi, to get a relatively short floor that still has treasure. Agreeing with Ginko will just pick randomly from the same 3 options, if you're curious. Pick whatever you like, but for the sake of treasures, this walkthrough is going with Eikichi. When you're done, talk to everyone and then advance.B7F: For some reason, you're a floor higher now even though there was no elevators, ramps, or stairs, but whatever. So, straight north and a little east from where you emerge is a chest containing Quake Card, but there is a trap on the south side of it. Feel free to go around and grab it from the east, but at this point in the game the damage really doesn't do much. About the same spot on the west you have another chest containing a Miracle Soda, also with a damage trap. This map is a bit maze-like, but simple over all. But I think if I explain each and every turn east, west, north, or south, it would just be confusing. So, make your way to the northwest corner for Bead x3. In the northeast you'll find a Samakaja Card. and in the center-north, you'll find the lift to B8F. Take it.B8F: So there isn't much to see here at the beginning other than the fact that this area of the map looks like a skull. If you head east from the "eye" of the skull, you'll notice the door to the Lamat Hall. There is a treasure chest to the north but it literally just hurts you, so go ahead and enter the room for a cutscene and mini-boss. During the conversation before the fight, if you say Definitely. the boss stats will be a bit lower than if you say I'm not so sure., so obviously, say the first one.Boss: Longinus #1, #2, #3, and #4: All four of them nullify Light, Dark, Nerve, and Mind. They all also resist all physical. #1 has no weaknesses, but #2 is weak to fire, #3 is weak to wind, and #4 is weak to water. Do your best, but they are only a little bit stronger than the previous Longinus enemies.When you are done with the fight, you'll see another cutscene. Speak to everyone and advance. If you head to the southeast, you'll find a Mediarama Card in a chest. Make your way west from here. In the southern portion of the map, you'll find that same elevator from earlier. If you would like yo return to B5F or the World Map for any reason, you can freely use it to travel between B5F and B8F now. To the west of this elevator is the Muluk' Hall, but before you enter, there is a HP Incense to the southwest of it. Enter the Muluk' Hall for another cutscene and another mini-boss.Boss: Metal Daddy: As usual, he nullifies Light, Dark, Nerve, and Mind. He doesn't have anything particular that stands out, so just keep healed and whittle his health down.After the boss fight, talk to everyone as usual, and advance. There is just a short path up to the lift to B9F now. Make sure to grab the Miracle Egg x5 on the way, and ride it down.B9F: Southeast of the lift, you'll find a Star Metal Helm which is better than anything you could have purchased so far, so definitely snatch that shit. There is nothing else of interest for now, so just head west from this treasure to find the door to Ok Hall and enter for yet another cutscene and mini-boss.Boss: Metal Mama: Once again, she nullifies Light, Dark, Nerve, and Mind. She reflects all magic, so you'll have to use physical attacks only. Also, Jun will not be present for this fight. Other than that, just keep healed as usual.After you exit the Ok Hall, there will be a chest containing Balm of Life x3 just to the south of the door. From here, head east and south at the turn, then to the far east again. In a little northeast nook, you'll find SP Incense. Follow the little trail that leads west again from here to find the Cryonics Room. Enter for another cutscene and mini-boss.Boss: Bolontiku x5: These enemies have insta-kill moves and can Charm and Enrage you. Each one has different stats too, which represents the 5 of you. It's hard to tell which is which since they are moving around and whatnot, but if you can figure it out, based on the moves they use, this will help you:
Tatsuya: Weak to water and ice.
Ginko: Weak to wind.
Michel: Weak to fire.
Maya: Weak to physical.
Jun: Weak to earth.
Basically, just hit with all your most heavy hitting spells and attacks, and do your best to revive and heal as much as possible. You've got this.When you're done with the fight, talk to everyone, and advance. There is nothing out here other than the door to go forward, so move around either east or west and to the middle-north you'll find the doors to the Heart of Xibalba.Now, make sure you're ready, because this is it. This is the series of final bosses of the entire game. When you're ready, enter.Final Boss I: Fuhrer: Time to kick Hitler's stupid ass. Like the usual routine, he nullifies Light, Dark, and Mind, but he actually only resists Nerve. He is weak to nothing and reflects nothing. This one is pretty easy.
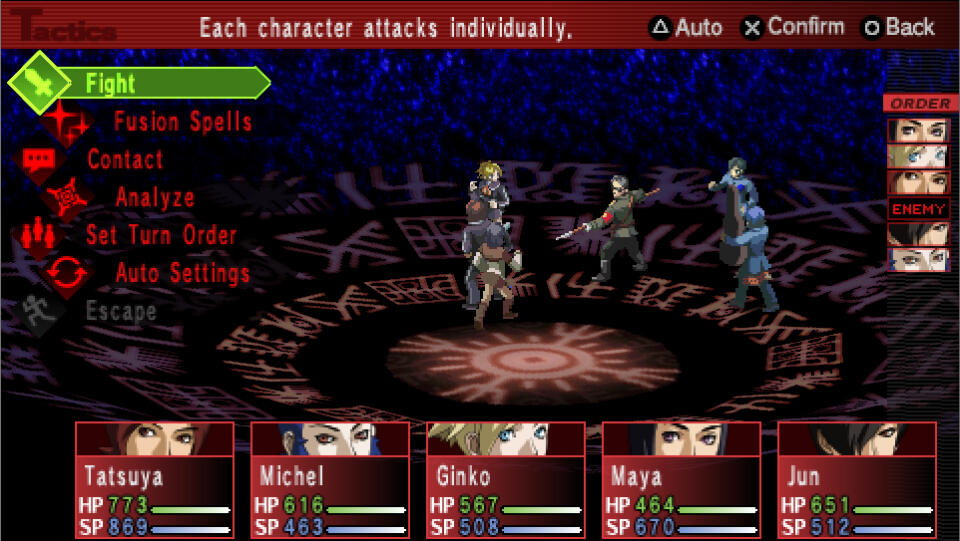
After you defeat the Fuhrer, you'll be thrust into another series of important cutscenes and plot twists. Once it's over, you're on the next boss.Final Boss II: Great Father: He is made up of 5 different targets. The head, left arm, right arm, left leg, and right leg. As usual, they all nullify Light, Dark, Nerve, and Mind. None of them have any weaknesses or strengths. Each arm and leg have 5,000 HP, and the head has 13,308 HP. So the general strategy here is to just use your multi-target spells as much as possible to wipe out his extremities first while you also are damaging the head. This fight is honestly mostly just an endurance battle. Just keep healed, keep attacking, and you're in the clear.
After the fight, you'll have some long cutscenes, and eventually you'll get a prompt from Philemon. You can choose to Thank him or to Hit him. If you choose to hit him he will reveal something about himself. Watch the rest of the scenes and end credits and uh...that's it! Congratulations! If you feel like the ending was a bit open ended, well there's a reason for that. Persona 2: Innocent Sin has a sequel, Persona 2: Eternal Punishment! I will be working on the walkthrough for that, and the link to my WIP is below. Thank you for going through this journey with me. You can find other walkthroughs I have done below as well!
Thriivan's Walkthroughs
Contact Guide
When in battle you may choose to Contact the personas. You can get various things from them such as healing and items, but most importantly, raising their Eagerness level gets you their Tarot Cards. This is one of the most important mechanics of the game because these allow you to fuse new, stronger personas. So I highly recommend doing this often. Raising Happiness allows you to form a pact with the demon. This makes them give you items, money, or information the next time you encounter them. The correct dialogue choices with the correct character is the only way these conversations will be successful. However, the demons can also be unpredictable and will respond differently to the same things when they ask you questions, so there is still some luck and RNG involved. Below are all the correct dialogue choices, organized by dungeon.
Seven Sisters High
Ghost: 2 Devil Cards and 1 Free Card
Eager: Death Stare on Tatsuya
Happy: Maya and Eikichi(Michel)Slime: 3 Tower Cards and 2 Free Cards
Eager: Death Stare on Tatsuya
Happy: Seduce with LisaPixie: 4 Lovers Cards and 3 Free Cards
Eager: Discuss Manliness on Tatsuya
Happy: Do Impressions with TatsuyaPoltergeist: 4 Devil Cards and 3 Free Cards
Eager: Persuade on Tatsuya
Happy: Maya and Eikichi(Michel)Nightmare: 6 Moon Cards and 4 Free Cards
Eager: Persuade on Tatsuya
Happy: Reason with YukkiXaphan: 8 Hanged Man Cards and 6 Free Cards
Eager: Discuss Manliness on Tatsuya
Happy: Do Impressions with TatsuyaRatatoskr: 8 Hermit Cards and 6 Free Cards
Eager: Self Promotion with Michel
Happy: Persuade on Tatsuya
Zodiac
Pixie: 4 Lovers Cards and 3 Free Cards
Eager: Discuss Manliness on Tatsuya
Happy: Do Impressions with TatsuyaPoltergeist: 4 Devil Cards and 3 Free Cards
Eager: Persuade on Tatsuya
Happy: Maya and Eikichi(Michel)Xaphan: 8 Hanged Man Cards and 6 Free Cards
Eager: Discuss Manliness on Tatsuya
Happy: Do Impressions with TatsuyaRatatoskr: 8 Hermit Cards and 6 Free Cards
Eager: Self Promotion with Michel
Happy: Persuade on TatsuyaNightmare: 6 Moon Cards and 4 Free Cards
Eager: Persuade on Tatsuya
Happy: Reason with YukkiBlob: 6 Tower Cards and 4 Free Cards
Eager: Death Stare on Tatsuya
Happy: Seduce with Ginko(Lisa)Harpy: 10 Temperance Cards and 7 Free Cards
Eager: Discuss Parents with Maya
Happy: Persuade with TatsuyaPuck: 10 Lovers Cards and 7 Free Cards
Eager: Discuss Manliness with Tatsuya
Happy: Do Impressions with TatsuyaPhantom: 10 Devil Cards and 7 Free Cards
Eager: Death Stare on Tatsuya
Happy: Persuade with Tatsuya
Kasugayama High
Harpy: 10 Temperance Cards and 7 Free Cards
Eager: Discuss Parents with Maya
Happy: Persuade with TatsuyaPuck: 10 Lovers Cards and 7 Free Cards
Eager: Discuss Manliness with Tatsuya
Happy: Do Impressions with TatsuyaPhantom: 10 Devil Cards and 7 Free Cards
Eager: Death Stare on Tatsuya
Happy: Persuade with TatsuyaBlob: 6 Tower Cards and 4 Free Cards
Eager: Death Stare on Tatsuya
Happy: Seduce with Ginko(Lisa)Empusa: 12 Magician Cards and 9 Free Cards
Eager: Do Impressions with Tatsuya
Happy: Discuss Life with Michel(Eikichi)Phaleg: 13 Judgement Cards and 9 Free Cards
Eager: Self-Promotion with Michel(Eikichi)
Happy: Persuade with TatsuyaAgathion: 12 Star Cards and 9 Free Cards
Eager: Discuss Life with Michel(Eikichi)
Happy: Do Impressions with TatsuyaOgre: 12 Chariot Cards and 9 Free Cards
Eager: Take Control on Michel(Eikichi)
Happy: Consult with MayaApep: 13 Strength Cards and 9 Free Cards
Eager: Do Impressions with Tatsuya
Happy: Discuss Life with Michel(Eikichi)Nisroc: 15 Hanged Man Cards and 11 Free Cards
Eager: Interview with Maya
Happy: Do Impressions with TatsuyaErinyes: 20 Moon Cards and 15 Free Cards
Eager: Discuss Manliness with Tatsuya
Happy: Tatsuya and Maya
Air Raid Shelter
Empusa: 12 Magician Cards and 9 Free Cards
Eager: Do Impressions with Tatsuya
Happy: Discuss Life with Michel(Eikichi)Phaleg: 13 Judgement Cards and 9 Free Cards
Eager: Self-Promotion with Michel(Eikichi)
Happy: Persuade with TatsuyaAgathion: 12 Star Cards and 9 Free Cards
Eager: Discuss Life with Michel(Eikichi)
Happy: Do Impressions with TatsuyaOgre: 12 Chariot Cards and 9 Free Cards
Eager: Take Control on Michel(Eikichi)
Happy: Consult with MayaApep: 13 Strength Cards and 9 Free Cards
Eager: Do Impressions with Tatsuya
Happy: Discuss Life with Michel(Eikichi)Nisroc: 15 Hanged Man Cards and 11 Free Cards
Eager: Interview with Maya
Happy: Do Impressions with TatsuyaErinyes: 20 Moon Cards and 15 Free Cards
Eager: Discuss Manliness with Tatsuya
Happy: Tatsuya and MayaRobin Goodfellow: 17 Lovers Cards and 12 Free Cards
Eager: Self-Promotion with Michel(Eikichi)
Happy: Do Impressions with Tatsuya
Mu
Moh Shuvuu: 18 Temperance Cards and 13 Free Cards
Eager: Dance with Ginko(Lisa)
Happy: Discuss Life with Eikichi(Michel)Ixtab: 20 Death Cards and 15 Free Cards
Eager: Dance with Ginko(Lisa)
Happy: Discuss Life with Eikichi(Michel)Ochre Jelly: 20 Tower Cards and 15 Free Cards
Eager: Death Stare with Tatsuya
Happy: Maya and Eikichi(Michel)Cockatrice: 9 World Cards and 6 Free Cards
Eager: Death Stare with Tatsuya
Happy: Seduce with Ginko(Lisa)Nekomata: 20 Hermit Cards and 15 Free Cards
Eager: Self-Promotion with Michel(Eikichi)
Happy: Sing with Michel(Eikichi)Minotaur: 20 Chariot Cards and 15 Free Cards
Eager: Take Control with Michel(Eikichi)
Happy: Consult with MayaRobin Goodfellow: 17 Lovers Cards and 12 Free Cards
Eager: Self-Promotion with Michel(Eikichi)
Happy: Do Impressions with Tatsuya
Giga Macho
Moh Shuvuu: 18 Temperance Cards and 13 Free Cards
Eager: Dance with Ginko(Lisa)
Happy: Discuss Life with Eikichi(Michel)Ixtab: 20 Death Cards and 15 Free Cards
Eager: Dance with Ginko(Lisa)
Happy: Discuss Life with Eikichi(Michel)Ochre Jelly: 20 Tower Cards and 15 Free Cards
Eager: Death Stare with Tatsuya
Happy: Maya and Eikichi(Michel)Cockatrice: 9 World Cards and 6 Free Cards
Eager: Death Stare with Tatsuya
Happy: Seduce with Ginko(Lisa)Minotaur: 20 Chariot Cards and 15 Free Cards
Eager: Take Control with Michel(Eikichi)
Happy: Consult with MayaNekomata: 20 Hermit Cards and 15 Free Cards
Eager: Self-Promotion with Michel(Eikichi)
Happy: Sing with Michel(Eikichi)Kinnara: 20 Star Cards and 15 Free Cards
Eager: Take Control with Michel(Eikichi)
Happy: Do Impressions with TatsuyaWraith: 16 Devil Cards and 12 Free Cards
Eager: Dance with Ginko(Lisa)
Happy: Discuss Life with Michel(Eikichi)Tengu: 23 Magician Cards and 17 Free Cards
Eager: Self-Promotion with Michel(Eikichi)
Happy: Persuade with TatsuyaShax: 23 Hanged Man Cards and 17 Free Cards
Eager: Do Impressions with Tatsuya
Happy: Discuss Life with Michel(Eikichi)Kiyohime: 27 Strength Cards and 20 Free Cards
Eager: Compliment with Maya
Happy: Take Photo with YukkiJack Frost: 10 Lovers Cards and 7 Free Cards
Eager: Death Stare with Tatsuya
Happy: Dance with Ginko(Lisa)
Aoba Park
Kinnara: 20 Star Cards and 15 Free Cards
Eager: Take Control with Michel(Eikichi)
Happy: Do Impressions with TatsuyaWraith: 16 Devil Cards and 12 Free Cards
Eager: Dance with Ginko(Lisa)
Happy: Discuss Life with Michel(Eikichi)Tengu: 23 Magician Cards and 17 Free Cards
Eager: Self-Promotion with Michel(Eikichi)
Happy: Persuade with TatsuyaShax: 23 Hanged Man Cards and 17 Free Cards
Eager: Do Impressions with Tatsuya
Happy: Discuss Life with Michel(Eikichi)Kiyohime: 27 Strength Cards and 20 Free Cards
Eager: Compliment with Maya
Happy: Take Photo with YukkiJack Frost: 10 Lovers Cards and 7 Free Cards
Eager: Death Stare with Tatsuya
Happy: Dance with Ginko(Lisa)Angel: 25 Judgement Cards and 18 Free Cards
Eager: Self-Promotion with Michel(Eikichi)
Happy: Discuss Parents with MayaFjalar: 25 Temperance Cards and 18 Free Cards
Eager: Sing with Michel(Eikichi)
Happy: Discuss Life with Michel(Eikichi)Minotaur: 20 Chariot Cards and 15 Free Cards
Eager: Take Control with Michel(Eikichi)
Happy: Consult with Maya
Concert Hall
Kinnara: 20 Star Cards and 15 Free Cards
Eager: Take Control with Michel(Eikichi)
Happy: Do Impressions with TatsuyaWraith: 16 Devil Cards and 12 Free Cards
Eager: Dance with Ginko(Lisa)
Happy: Discuss Life with Michel(Eikichi)Tengu: 23 Magician Cards and 17 Free Cards
Eager: Self-Promotion with Michel(Eikichi)
Happy: Persuade with TatsuyaShax: 23 Hanged Man Cards and 17 Free Cards
Eager: Do Impressions with Tatsuya
Happy: Discuss Life with Michel(Eikichi)Kiyohime: 27 Strength Cards and 20 Free Cards
Eager: Compliment with Maya
Happy: Take Photo with YukkiJack Frost: 10 Lovers Cards and 7 Free Cards
Eager: Death Stare with Tatsuya
Happy: Dance with Ginko(Lisa)Angel: 25 Judgement Cards and 18 Free Cards
Eager: Self-Promotion with Michel(Eikichi)
Happy: Discuss Parents with MayaFjalar: 25 Temperance Cards and 18 Free Cards
Eager: Sing with Michel(Eikichi)
Happy: Discuss Life with Michel(Eikichi)Faust: 30 Magician Cards and 22 Free Cards
Eager: Discuss Parents with Maya
Happy: Discuss Life with Michel(Eikichi)
Smile Hirasaka
Faust: 30 Magician Cards and 22 Free Cards
Eager: Discuss Parents with Maya
Happy: Discuss Life with Michel(Eikichi)Angel: 25 Judgement Cards and 18 Free Cards
Eager: Self-Promotion with Michel(Eikichi)
Happy: Discuss Parents with MayaFjalar: 25 Temperance Cards and 18 Free Cards
Eager: Sing with Michel(Eikichi)
Happy: Discuss Life with Michel(Eikichi)Kraken: 25 World Cards and 18 Free Cards
Eager: Death Stare on Tatsuya
Happy: Speak w/ Fists on YukkiGandharva: 30 Star Cards and 22 Free Cards
Eager: Self-Promotion with Michel(Eikichi)
Happy: Do Impressions with TatsuyaHel: 37 Death Cards and 27 Free Cards
Eager: Reason with Yukki
Happy: Discuss Life with Michel(Eikichi)Pairika: 35 Moon Cards and 26 Free Cards
Eager: Dance with Ginko(Lisa)
Happy: Discuss Life with Michel(Eikichi)Lich: 30 Devil Cards and 22 Free Cards
Eager: Discuss Manliness with Tatsuya
Happy: Discuss Life with Michel(Eikichi)
GOLD
Faust: 30 Magician Cards and 22 Free Cards
Eager: Discuss Parents with Maya
Happy: Discuss Life with Michel(Eikichi)Angel: 25 Judgement Cards and 18 Free Cards
Eager: Self-Promotion with Michel(Eikichi)
Happy: Discuss Parents with MayaFjalar: 25 Temperance Cards and 18 Free Cards
Eager: Sing with Michel(Eikichi)
Happy: Discuss Life with Michel(Eikichi)Kraken: 25 World Cards and 18 Free Cards
Eager: Death Stare on Tatsuya
Happy: Speak w/ Fists on YukkiGandharva: 30 Star Cards and 22 Free Cards
Eager: Self-Promotion with Michel(Eikichi)
Happy: Do Impressions with TatsuyaHel: 37 Death Cards and 27 Free Cards
Eager: Reason with Yukki
Happy: Discuss Life with Michel(Eikichi)Pairika: 35 Moon Cards and 26 Free Cards
Eager: Dance with Ginko(Lisa)
Happy: Discuss Life with Michel(Eikichi)Lich: 30 Devil Cards and 22 Free Cards
Eager: Discuss Manliness with Tatsuya
Happy: Discuss Life with Michel(Eikichi)Rasputin: 36 Magician Cards and 27 Free Cards
Eager: Dance with Ginko(Lisa)
Happy: Discuss Life with Michel(Eikichi)Kabandha: 35 Hanged Man Cards and 26 Free Cards
Eager: Discuss Manliness with Tatsuya
Happy: Do Impressions with TatsuyaPyro Jack: 40 Lovers Cards and 30 Free Cards
Eager: Death Stare with Tatsuya
Happy: Do Impressions with Tatsuya
Aerospace Museum
Gandharva: 30 Star Cards and 22 Free Cards
Eager: Self-Promotion with Michel(Eikichi)
Happy: Do Impressions with TatsuyaHel: 37 Death Cards and 27 Free Cards
Eager: Reason with Yukki
Happy: Discuss Life with Michel(Eikichi)Pairika: 35 Moon Cards and 26 Free Cards
Eager: Dance with Ginko(Lisa)
Happy: Discuss Life with Michel(Eikichi)Lich: 30 Devil Cards and 22 Free Cards
Eager: Discuss Manliness with Tatsuya
Happy: Discuss Life with Michel(Eikichi)Rasputin: 36 Magician Cards and 27 Free Cards
Eager: Dance with Ginko(Lisa)
Happy: Discuss Life with Michel(Eikichi)Kabandha: 35 Hanged Man Cards and 26 Free Cards
Eager: Discuss Manliness with Tatsuya
Happy: Do Impressions with TatsuyaPyro Jack: 40 Lovers Cards and 30 Free Cards
Eager: Death Stare with Tatsuya
Happy: Do Impressions with TatsuyaKanaloa: 35 Tower Cards and 26 Free Cards
Eager: Take Control with Michel(Eikichi)
Happy: Consult with MayaTaranis: 40 Chariot Cards and 30 Free Cards
Eager: Take Control with Michel(Eikichi)
Happy: Consult with Maya
Mt. Iwato
Pyro Jack: 40 Lovers Cards and 30 Free Cards
Eager: Death Stare with Tatsuya
Happy: Do Impressions with TatsuyaKanaloa: 35 Tower Cards and 26 Free Cards
Eager: Take Control with Michel(Eikichi)
Happy: Consult with MayaTaranis: 40 Chariot Cards and 30 Free Cards
Eager: Take Control with Michel(Eikichi)
Happy: Consult with MayaCamazotz: 35 Temperance Cards and 26 Free Cards
Eager: Discuss Manliness with Tatsuya
Happy: Discuss Life with Michel(Eikichi)Cwn Annwn: 35 Hermit Cards and 26 Free Cards
Eager: Take Control with Michel(Eikichi)
Happy: Speak w/ Fists on YukkiCulebre: 40 Strength Cards and 30 Free Cards
Eager: Do Impressions with Tatsuya
Happy: Discuss Life with Michel(Eikichi)Principality: 40 Judgement Cards and 30 Free Cards
Eager: Discuss Parents with Maya
Happy: Discuss Life with Michel(Eikichi)Picollus: 40 Star Cards and 30 Free Cards
Eager: Kung Fu with Ginko(Lisa)
Happy: Do Impressions with TatsuyaHunhau: 45 Death Cards and 33 Free Cards
Eager: Interview with Maya
Happy: Speak w/ Fists on YukkiAgrippa: 45 Magician Cards and 33 Free Cards
Eager: Do Impressions with Tatsuya
Happy: Discuss Life with Michel(Eikichi)Demeter: 30 World Cards and 22 Free Cards
Eager: Persuade with Tatsuya
Happy: Discuss Love with Ginko(Lisa)
Mt. Katatsumuri
Zaebos: 42 Hanged Man Cards and 31 Free Cards
Eager: Kung Fu with Ginko(Lisa)
Happy: Do Impressions with TatsuyaWanyudo: 33 Fortune Cards and 24 Free Cards
Eager: Death Stare with Tatsuya
Happy: Speak w/ Fists on YukkiDemon King: 44 Devil Cards and 33 Free Cards
Eager: Interview with Maya
Happy: Speak w/ Fists on YukkiShoggoth: 40 Tower Cards and 30 Free Cards
Eager: Self-Promotion with Michel(Eikichi)
Happy: Discuss Parents with MayaPython: 40 Strength Cards and 33 Free Cards
Eager: Death Stare with Tatsuya
Happy: Speak w/ Fists on YukkiLilim: 56 Moon Cards and 42 Free Cards
Eager: Discuss Manliness with Tatsuya
Happy: Discuss Life with Michel(Eikichi)Satyr: 50 Lovers Cards and 37 Free Cards
Eager: Death Stare with Tatsuya
Happy: Do Impressions with Tatsuya
Caracol
Python: 40 Strength Cards and 33 Free Cards
Eager: Death Stare with Tatsuya
Happy: Speak w/ Fists on YukkiStymphalides: 40 Temperance Cards and 30 Free Cards
Eager: Do Impressions with Tatsuya
Happy: Consult with MayaShoggoth: 40 Tower Cards and 30 Free Cards
Eager: Self-Promotion with Michel(Eikichi)
Happy: Discuss Parents with MayaCrowley: 55 Magician Cards and 41 Free Cards
Eager: Discuss Manliness with Tatsuya
Happy: Discuss Life with Michel(Eikichi)Hoenir: 48 Star Cards and 36 Free Cards
Eager: Maya + Yukki
Happy: Discuss Parents with MayaLeviathan: 45 World Cards and 33 Free Cards
Eager: Take Control with Michel(Eikichi)
Happy: Speak w/ Fists on YukkiRakshasa: 55 Chariot Cards and 41 Free Cards
Eager: Do Impressions with Tatsuya
Happy: Consult with MayaOrthrus: 55 Fortune Cards and 45 Free Cards
Eager: Take Control with Michel(Eikichi)
Happy: Speak w/ Fists on YukkiBarbatos: 55 Hanged Man Cards and 41 Free Cards
Eager: Discuss Manliness with Tatsuya
Happy: Discuss Life with Michel(Eikichi)Catoblepas: 58 Hermit Cards and 43 Free Cards
Eager: Persuade with Tatsuya
Happy: Tell Horoscope with JunAeshma: 52 Tower Cards and 39 Free Cards
Eager: Take Control with Michel(Eikichi)
Happy: Consult with MayaLilim: 56 Moon Cards and 42 Free Cards
Eager: Discuss Manliness with Tatsuya
Happy: Discuss Life with Michel(Eikichi)Satyr: 50 Lovers Cards and 37 Free Cards
Eager: Death Stare with Tatsuya
Happy: Do Impressions with Tatsuya
Zodiac Temples
Orthrus: 55 Fortune Cards and 45 Free Cards
Eager: Take Control with Michel(Eikichi)
Happy: Speak w/ Fists on YukkiBarbatos: 55 Hanged Man Cards and 41 Free Cards
Eager: Discuss Manliness with Tatsuya
Happy: Discuss Life with Michel(Eikichi)Catoblepas: 58 Hermit Cards and 43 Free Cards
Eager: Persuade with Tatsuya
Happy: Tell Horoscope with JunAeshma: 52 Tower Cards and 39 Free Cards
Eager: Take Control with Michel(Eikichi)
Happy: Consult with MayaMelchizedek: 60 Judgement Cards and 45 Free Cards
Eager: Self-Promotion with Michel(Eikichi)
Happy: Persuade with TatsuyaTaksaka: 60 Strength Cards and 45 Free Cards
Eager: Discuss Manliness with Tatsuya
Happy: Discuss Life with Michel(Eikichi)Ankou: 52 Death Cards and 39 Free Cards
Eager: Tell Horoscope with Jun
Happy: Ginko and Jun
Silver River
Vucub Caquix: 48 Temperance Cards and 36 Free Cards
Eager: Do Impressions with Tatsuya
Happy: Discuss Life with Michel(Eikichi)Hunab Ku: 52 World Cards and 39 Free Cards
Eager: Discuss Parents with Maya
Happy: Persuade with TatsuyaLucifuge: 66 Devil Cards and 49 Free Cards
Eager: Tatsuya + Jun
Happy: Persuade with TatsuyaSuccubus: 67 Moon Cards and 50 Free Cards
Eager: Tatsuya + Michel
Happy: Sing with Michel(Eikichi)Pucel: 63 Hanged Man Cards and 47 Free Cards
Eager: Discuss Parents with Maya
Happy: Discuss Life with Michel(Eikichi)Manannan: 70 Magician Cards and 52 Free Cards
Eager: Discuss Parents with Maya
Happy: Persuade with TatsuyaYaksa: 60 Star Cards and 45 Free Cards
Eager: Discuss Manliness with Tatsuya and Say it w/ Flowers with Jun
Happy: Do Impressions with TatsuyaNote: For Yaksa you have to alternate between Tatsuya and Jun since both of these characters raise 2 emotions at the same time.Seker: 60 Tower Cards and 45 Free Cards
Eager: Death Stare with Tatsuya
Happy: Persuade with TatsuyaAres: 65 Chariot Cards and 48 Free Cards
Eager: Kung Fu with Ginko(Lisa)
Happy: Do Impressions with Tatsuya
Inside Xibalba
Vucub Caquix: 48 Temperance Cards and 36 Free Cards
Eager: Do Impressions with Tatsuya
Happy: Discuss Life with Michel(Eikichi)Hunab Ku: 52 World Cards and 39 Free Cards
Eager: Discuss Parents with Maya
Happy: Persuade with TatsuyaLucifuge: 66 Devil Cards and 49 Free Cards
Eager: Tatsuya + Jun
Happy: Persuade with TatsuyaSuccubus: 67 Moon Cards and 50 Free Cards
Eager: Tatsuya + Michel
Happy: Sing with Michel(Eikichi)Pucel: 63 Hanged Man Cards and 47 Free Cards
Eager: Discuss Parents with Maya
Happy: Discuss Life with Michel(Eikichi)Manannan: 70 Magician Cards and 52 Free Cards
Eager: Discuss Parents with Maya
Happy: Persuade with TatsuyaYaksa: 60 Star Cards and 45 Free Cards
Eager: Discuss Manliness with Tatsuya and Say it w/ Flowers with Jun
Happy: Do Impressions with TatsuyaNote: For Yaksa you have to alternate between Tatsuya and Jun since both of these characters raise 2 emotions at the same time.Seker: 60 Tower Cards and 45 Free Cards
Eager: Death Stare with Tatsuya
Happy: Persuade with TatsuyaAres: 65 Chariot Cards and 48 Free Cards
Eager: Kung Fu with Ginko(Lisa)
Happy: Do Impressions with TatsuyaCerberus: 68 Fortune Cards and 51 Free Cards
Eager: Do Impressions with Tatsuya
Happy: Discuss Life with Michel(Eikichi)Fafnir: 72 Strength Cards and 54 Free Cards
Eager: Discuss Parents with Maya
Happy: Discuss Life with Michel(Eikichi)Throne: 75 Judgement Cards and 56 Free Cards
Eager: Self-Promotion with Michel(Eikichi)
Happy: Persuade with TatsuyaMucalinda: 60 World Cards and 45 Free Cards
Eager: Do Impressions with Tatsuya
Happy: Discuss Life with Michel(Eikichi)Phoenix: 54 Temperance Cards and 40 Free Cards
Eager: Do Impressions with Tatsuya
Happy: Tell Horoscope with JunJahi: 78 Moon Cards and 58 Free Cards
Eager: Tatsuya + Maya
Happy: Persuade with TatsuyaKinich Ahau: 76 Hermit Cards and 57 Free Cards
Eager: Compliment with Maya
Happy: Fawn on with JunAdramelech: 78 Hanged Man Cards and 58 Free Cards
Eager: Do Impressions with Tatsuya
Happy: Tatsuya and GinkoTezcatlipoca: 75 Tower Cards and 56 Free Cards
Eager: Ginko and Jun
Happy: Persuade with TatsuyaTzitzimitl: 85 Devil Cards and 63 Free Cards
Eager: Interview with Maya
Happy: Tatsuya, Eikichi and JunKisin: 65 Death Cards and 48 Free Cards
Eager: Tatsuya and Jun
Happy: Persuade with TatsuyaValkyrie: 70 Star Cards and 52 Free Cards
Eager: Ginko and Jun
Happy: Do Impressions with TatsuyaOuroboros: 72 World Cards and 54 Free Cards
Eager: Discuss Parents with Maya
Happy: Persuade with TatsuyaAh Puch: 80 Death Cards and 60 Free Cards
Eager: Discuss Manliness with Tatsuya
Happy: Discuss Life with Michel(Eikichi)
Optional: Abandoned FactoryRoom 01: Service Entrance
Ghost: 2 Devil Cards and 1 Free Card
Eager: Death Stare on Tatsuya
Happy: Maya and Eikichi(Michel)Slime: 3 Tower Cards and 2 Free Cards
Eager: Death Stare on Tatsuya
Happy: Seduce with LisaPixie: 4 Lovers Cards and 3 Free Cards
Eager: Discuss Manliness on Tatsuya
Happy: Do Impressions with TatsuyaPoltergeist: 4 Devil Cards and 3 Free Cards
Eager: Persuade on Tatsuya
Happy: Maya and Eikichi(Michel)Nightmare: 6 Moon Cards and 4 Free Cards
Eager: Persuade on Tatsuya
Happy: Reason with YukkiXaphan: 8 Hanged Man Cards and 6 Free Cards
Eager: Discuss Manliness on Tatsuya
Happy: Do Impressions with TatsuyaRatatoskr: 8 Hermit Cards and 6 Free Cards
Eager: Self Promotion with Michel
Happy: Persuade on TatsuyaBlob: 6 Tower Cards and 4 Free Cards
Eager: Death Stare on Tatsuya
Happy: Seduce with Ginko(Lisa)Harpy: 10 Temperance Cards and 7 Free Cards
Eager: Discuss Parents with Maya
Happy: Persuade with TatsuyaPuck: 10 Lovers Cards and 7 Free Cards
Eager: Discuss Manliness with Tatsuya
Happy: Do Impressions with TatsuyaPhantom: 10 Devil Cards and 7 Free Cards
Eager: Death Stare on Tatsuya
Happy: Persuade with TatsuyaEmpusa: 12 Magician Cards and 9 Free Cards
Eager: Do Impressions with Tatsuya
Happy: Discuss Life with Michel(Eikichi)Phaleg: 13 Judgement Cards and 9 Free Cards
Eager: Self-Promotion with Michel(Eikichi)
Happy: Persuade with TatsuyaAgathion: 12 Star Cards and 9 Free Cards
Eager: Discuss Life with Michel(Eikichi)
Happy: Do Impressions with TatsuyaOgre: 12 Chariot Cards and 9 Free Cards
Eager: Take Control on Michel(Eikichi)
Happy: Consult with MayaApep: 13 Strength Cards and 9 Free Cards
Eager: Do Impressions with Tatsuya
Happy: Discuss Life with Michel(Eikichi)Nisroc: 15 Hanged Man Cards and 11 Free Cards
Eager: Interview with Maya
Happy: Do Impressions with TatsuyaErinyes: 20 Moon Cards and 15 Free Cards
Eager: Discuss Manliness with Tatsuya
Happy: Tatsuya and MayaRobin Goodfellow: 17 Lovers Cards and 12 Free Cards
Eager: Self-Promotion with Michel(Eikichi)
Happy: Do Impressions with Tatsuya
Room 02: Factory
Moh Shuvuu: 18 Temperance Cards and 13 Free Cards
Eager: Dance with Ginko(Lisa)
Happy: Discuss Life with Eikichi(Michel)Ixtab: 20 Death Cards and 15 Free Cards
Eager: Dance with Ginko(Lisa)
Happy: Discuss Life with Eikichi(Michel)Ochre Jelly: 20 Tower Cards and 15 Free Cards
Eager: Death Stare with Tatsuya
Happy: Maya and Eikichi(Michel)Cockatrice: 9 World Cards and 6 Free Cards
Eager: Death Stare with Tatsuya
Happy: Seduce with Ginko(Lisa)Nekomata: 20 Hermit Cards and 15 Free Cards
Eager: Self-Promotion with Michel(Eikichi)
Happy: Sing with Michel(Eikichi)Minotaur: 20 Chariot Cards and 15 Free Cards
Eager: Take Control with Michel(Eikichi)
Happy: Consult with MayaKinnara: 20 Star Cards and 15 Free Cards
Eager: Take Control with Michel(Eikichi)
Happy: Do Impressions with TatsuyaWraith: 16 Devil Cards and 12 Free Cards
Eager: Dance with Ginko(Lisa)
Happy: Discuss Life with Michel(Eikichi)Tengu: 23 Magician Cards and 17 Free Cards
Eager: Self-Promotion with Michel(Eikichi)
Happy: Persuade with TatsuyaShax: 23 Hanged Man Cards and 17 Free Cards
Eager: Do Impressions with Tatsuya
Happy: Discuss Life with Michel(Eikichi)Kiyohime: 27 Strength Cards and 20 Free Cards
Eager: Compliment with Maya
Happy: Take Photo with YukkiJack Frost: 10 Lovers Cards and 7 Free Cards
Eager: Death Stare with Tatsuya
Happy: Dance with Ginko(Lisa)Angel: 25 Judgement Cards and 18 Free Cards
Eager: Self-Promotion with Michel(Eikichi)
Happy: Discuss Parents with MayaFjalar: 25 Temperance Cards and 18 Free Cards
Eager: Sing with Michel(Eikichi)
Happy: Discuss Life with Michel(Eikichi)Faust: 30 Magician Cards and 22 Free Cards
Eager: Discuss Parents with Maya
Happy: Discuss Life with Michel(Eikichi)
Room 03: Factory
Jack Frost: 10 Lovers Cards and 7 Free Cards
Eager: Death Stare with Tatsuya
Happy: Dance with Ginko(Lisa)Angel: 25 Judgement Cards and 18 Free Cards
Eager: Self-Promotion with Michel(Eikichi)
Happy: Discuss Parents with MayaFjalar: 25 Temperance Cards and 18 Free Cards
Eager: Sing with Michel(Eikichi)
Happy: Discuss Life with Michel(Eikichi)Faust: 30 Magician Cards and 22 Free Cards
Eager: Discuss Parents with Maya
Happy: Discuss Life with Michel(Eikichi)Kraken: 25 World Cards and 18 Free Cards
Eager: Death Stare on Tatsuya
Happy: Speak w/ Fists on YukkiGandharva: 30 Star Cards and 22 Free Cards
Eager: Self-Promotion with Michel(Eikichi)
Happy: Do Impressions with TatsuyaHel: 37 Death Cards and 27 Free Cards
Eager: Reason with Yukki
Happy: Discuss Life with Michel(Eikichi)Pairika: 35 Moon Cards and 26 Free Cards
Eager: Dance with Ginko(Lisa)
Happy: Discuss Life with Michel(Eikichi)Lich: 30 Devil Cards and 22 Free Cards
Eager: Discuss Manliness with Tatsuya
Happy: Discuss Life with Michel(Eikichi)Rasputin: 36 Magician Cards and 27 Free Cards
Eager: Dance with Ginko(Lisa)
Happy: Discuss Life with Michel(Eikichi)Kabandha: 35 Hanged Man Cards and 26 Free Cards
Eager: Discuss Manliness with Tatsuya
Happy: Do Impressions with TatsuyaPyro Jack: 40 Lovers Cards and 30 Free Cards
Eager: Death Stare with Tatsuya
Happy: Do Impressions with Tatsuya
Room 04: Office
Kraken: 25 World Cards and 18 Free Cards
Eager: Death Stare on Tatsuya
Happy: Speak w/ Fists on YukkiGandharva: 30 Star Cards and 22 Free Cards
Eager: Self-Promotion with Michel(Eikichi)
Happy: Do Impressions with TatsuyaHel: 37 Death Cards and 27 Free Cards
Eager: Reason with Yukki
Happy: Discuss Life with Michel(Eikichi)Pairika: 35 Moon Cards and 26 Free Cards
Eager: Dance with Ginko(Lisa)
Happy: Discuss Life with Michel(Eikichi)Lich: 30 Devil Cards and 22 Free Cards
Eager: Discuss Manliness with Tatsuya
Happy: Discuss Life with Michel(Eikichi)Rasputin: 36 Magician Cards and 27 Free Cards
Eager: Dance with Ginko(Lisa)
Happy: Discuss Life with Michel(Eikichi)Kabandha: 35 Hanged Man Cards and 26 Free Cards
Eager: Discuss Manliness with Tatsuya
Happy: Do Impressions with TatsuyaPyro Jack: 40 Lovers Cards and 30 Free Cards
Eager: Death Stare with Tatsuya
Happy: Do Impressions with TatsuyaKanaloa: 35 Tower Cards and 26 Free Cards
Eager: Take Control with Michel(Eikichi)
Happy: Consult with MayaTaranis: 40 Chariot Cards and 30 Free Cards
Eager: Take Control with Michel(Eikichi)
Happy: Consult with Maya
Room 05: Storage
Camazotz: 35 Temperance Cards and 26 Free Cards
Eager: Discuss Manliness with Tatsuya
Happy: Discuss Life with Michel(Eikichi)Cwn Annwn: 35 Hermit Cards and 26 Free Cards
Eager: Take Control with Michel(Eikichi)
Happy: Speak w/ Fists on YukkiCulebre: 40 Strength Cards and 30 Free Cards
Eager: Do Impressions with Tatsuya
Happy: Discuss Life with Michel(Eikichi)Principality: 40 Judgement Cards and 30 Free Cards
Eager: Discuss Parents with Maya
Happy: Discuss Life with Michel(Eikichi)Picollus: 40 Star Cards and 30 Free Cards
Eager: Kung Fu with Ginko(Lisa)
Happy: Do Impressions with TatsuyaHunhau: 45 Death Cards and 33 Free Cards
Eager: Interview with Maya
Happy: Speak w/ Fists on YukkiAgrippa: 45 Magician Cards and 33 Free Cards
Eager: Do Impressions with Tatsuya
Happy: Discuss Life with Michel(Eikichi)Demeter: 30 World Cards and 22 Free Cards
Eager: Persuade with Tatsuya
Happy: Discuss Love with Ginko(Lisa)Zaebos: 42 Hanged Man Cards and 31 Free Cards
Eager: Kung Fu with Ginko(Lisa)
Happy: Do Impressions with TatsuyaWanyudo: 33 Fortune Cards and 24 Free Cards
Eager: Death Stare with Tatsuya
Happy: Speak w/ Fists on YukkiDemon King: 44 Devil Cards and 33 Free Cards
Eager: Interview with Maya
Happy: Speak w/ Fists on YukkiShoggoth: 40 Tower Cards and 30 Free Cards
Eager: Self-Promotion with Michel(Eikichi)
Happy: Discuss Parents with MayaPython: 40 Strength Cards and 33 Free Cards
Eager: Death Stare with Tatsuya
Happy: Speak w/ Fists on YukkiLilim: 56 Moon Cards and 42 Free Cards
Eager: Discuss Manliness with Tatsuya
Happy: Discuss Life with Michel(Eikichi)Satyr: 50 Lovers Cards and 37 Free Cards
Eager: Death Stare with Tatsuya
Happy: Do Impressions with TatsuyaStymphalides: 40 Temperance Cards and 30 Free Cards
Eager: Do Impressions with Tatsuya
Happy: Consult with MayaCrowley: 55 Magician Cards and 41 Free Cards
Eager: Discuss Manliness with Tatsuya
Happy: Discuss Life with Michel(Eikichi)Hoenir: 48 Star Cards and 36 Free Cards
Eager: Maya + Yukki
Happy: Discuss Parents with MayaLeviathan: 45 World Cards and 33 Free Cards
Eager: Take Control with Michel(Eikichi)
Happy: Speak w/ Fists on YukkiRakshasa: 55 Chariot Cards and 41 Free Cards
Eager: Do Impressions with Tatsuya
Happy: Consult with MayaOrthrus: 55 Fortune Cards and 45 Free Cards
Eager: Take Control with Michel(Eikichi)
Happy: Speak w/ Fists on YukkiBarbatos: 55 Hanged Man Cards and 41 Free Cards
Eager: Discuss Manliness with Tatsuya
Happy: Discuss Life with Michel(Eikichi)Catoblepas: 58 Hermit Cards and 43 Free Cards
Eager: Persuade with Tatsuya
Happy: Tell Horoscope with JunAeshma: 52 Tower Cards and 39 Free Cards
Eager: Take Control with Michel(Eikichi)
Happy: Consult with Maya
Room 06: Control Room
Rakshasa: 55 Chariot Cards and 41 Free Cards
Eager: Do Impressions with Tatsuya
Happy: Consult with MayaOrthrus: 55 Fortune Cards and 45 Free Cards
Eager: Take Control with Michel(Eikichi)
Happy: Speak w/ Fists on YukkiBarbatos: 55 Hanged Man Cards and 41 Free Cards
Eager: Discuss Manliness with Tatsuya
Happy: Discuss Life with Michel(Eikichi)Catoblepas: 58 Hermit Cards and 43 Free Cards
Eager: Persuade with Tatsuya
Happy: Tell Horoscope with JunAeshma: 52 Tower Cards and 39 Free Cards
Eager: Take Control with Michel(Eikichi)
Happy: Consult with MayaMelchizedek: 60 Judgement Cards and 45 Free Cards
Eager: Self-Promotion with Michel(Eikichi)
Happy: Persuade with TatsuyaTaksaka: 60 Strength Cards and 45 Free Cards
Eager: Discuss Manliness with Tatsuya
Happy: Discuss Life with Michel(Eikichi)Ankou: 52 Death Cards and 39 Free Cards
Eager: Tell Horoscope with Jun
Happy: Ginko and JunVucub Caquix: 48 Temperance Cards and 36 Free Cards
Eager: Do Impressions with Tatsuya
Happy: Discuss Life with Michel(Eikichi)Hunab Ku: 52 World Cards and 39 Free Cards
Eager: Discuss Parents with Maya
Happy: Persuade with TatsuyaLucifuge: 66 Devil Cards and 49 Free Cards
Eager: Tatsuya + Jun
Happy: Persuade with TatsuyaSuccubus: 67 Moon Cards and 50 Free Cards
Eager: Tatsuya + Michel
Happy: Sing with Michel(Eikichi)Pucel: 63 Hanged Man Cards and 47 Free Cards
Eager: Discuss Parents with Maya
Happy: Discuss Life with Michel(Eikichi)Manannan: 70 Magician Cards and 52 Free Cards
Eager: Discuss Parents with Maya
Happy: Persuade with TatsuyaYaksa: 60 Star Cards and 45 Free Cards
Eager: Discuss Manliness with Tatsuya and Say it w/ Flowers with Jun
Happy: Do Impressions with TatsuyaNote: For Yaksa you have to alternate between Tatsuya and Jun since both of these characters raise 2 emotions at the same time.Seker: 60 Tower Cards and 45 Free Cards
Eager: Death Stare with Tatsuya
Happy: Persuade with TatsuyaAres: 65 Chariot Cards and 48 Free Cards
Eager: Kung Fu with Ginko(Lisa)
Happy: Do Impressions with TatsuyaCerberus: 68 Fortune Cards and 51 Free Cards
Eager: Do Impressions with Tatsuya
Happy: Discuss Life with Michel(Eikichi)Fafnir: 72 Strength Cards and 54 Free Cards
Eager: Discuss Parents with Maya
Happy: Discuss Life with Michel(Eikichi)Throne: 75 Judgement Cards and 56 Free Cards
Eager: Self-Promotion with Michel(Eikichi)
Happy: Persuade with Tatsuya
Executive Suite
Mucalinda: 60 World Cards and 45 Free Cards
Eager: Do Impressions with Tatsuya
Happy: Discuss Life with Michel(Eikichi)Phoenix: 54 Temperance Cards and 40 Free Cards
Eager: Do Impressions with Tatsuya
Happy: Tell Horoscope with JunJahi: 78 Moon Cards and 58 Free Cards
Eager: Tatsuya + Maya
Happy: Persuade with TatsuyaKinich Ahau: 76 Hermit Cards and 57 Free Cards
Eager: Compliment with Maya
Happy: Fawn on with JunAdramelech: 78 Hanged Man Cards and 58 Free Cards
Eager: Do Impressions with Tatsuya
Happy: Tatsuya and GinkoTezcatlipoca: 75 Tower Cards and 56 Free Cards
Eager: Ginko and Jun
Happy: Persuade with TatsuyaTzitzimitl: 85 Devil Cards and 63 Free Cards
Eager: Interview with Maya
Happy: Tatsuya, Eikichi and JunKisin: 65 Death Cards and 48 Free Cards
Eager: Tatsuya and Jun
Happy: Persuade with TatsuyaValkyrie: 70 Star Cards and 52 Free Cards
Eager: Ginko and Jun
Happy: Do Impressions with TatsuyaOuroboros: 72 World Cards and 54 Free Cards
Eager: Discuss Parents with Maya
Happy: Persuade with TatsuyaAh Puch: 80 Death Cards and 60 Free Cards
Eager: Discuss Manliness with Tatsuya
Happy: Discuss Life with Michel(Eikichi)
Liquid Waste Disposal
Mucalinda: 60 World Cards and 45 Free Cards
Eager: Do Impressions with Tatsuya
Happy: Discuss Life with Michel(Eikichi)Phoenix: 54 Temperance Cards and 40 Free Cards
Eager: Do Impressions with Tatsuya
Happy: Tell Horoscope with JunJahi: 78 Moon Cards and 58 Free Cards
Eager: Tatsuya + Maya
Happy: Persuade with TatsuyaKinich Ahau: 76 Hermit Cards and 57 Free Cards
Eager: Compliment with Maya
Happy: Fawn on with JunAdramelech: 78 Hanged Man Cards and 58 Free Cards
Eager: Do Impressions with Tatsuya
Happy: Tatsuya and GinkoTezcatlipoca: 75 Tower Cards and 56 Free Cards
Eager: Ginko and Jun
Happy: Persuade with TatsuyaTzitzimitl: 85 Devil Cards and 63 Free Cards
Eager: Interview with Maya
Happy: Tatsuya, Eikichi and JunKisin: 65 Death Cards and 48 Free Cards
Eager: Tatsuya and Jun
Happy: Persuade with TatsuyaValkyrie: 70 Star Cards and 52 Free Cards
Eager: Ginko and Jun
Happy: Do Impressions with TatsuyaOuroboros: 72 World Cards and 54 Free Cards
Eager: Discuss Parents with Maya
Happy: Persuade with TatsuyaAh Puch: 80 Death Cards and 60 Free Cards
Eager: Discuss Manliness with Tatsuya
Happy: Discuss Life with Michel(Eikichi)